
Project of the Year goes to - This Crazy 1970 Gibson SJN Southern Jumbo - Part 2
Well, phase 2 then! Since this guitar was in such a state and the back had to be removed with my absolute least favorite method (and the slowest) we now have an extraordinary amount of work needed here to prepare the guitar to go back together. Contrary to popular belief, you certainly cannot just glue the rear of the guitar back on with this removal method is employed, hahaha. I began separating the remaining kerfing from the back, and then worked slowly through the leftover neck and end blocks until the back was clean and ready.


Next up is the remaining kerfing around the back of the guitar itself. With a slight bit of heat, a thin spatula and a knife it is gently peeled and cut away until all that is left is some glue residue. It is then scraped away and lightly sanded to prep the surface for the new kerfing.


Next up are the blocks, yikes! I mark off a comfortable line to square things up to and then begin removing the wood so the donor piece will have plenty to grab a hold of when inserted. First, massage the end block then the neck block follows until I’m happy with the results. By the way, I’ve absolutely no idea what is going on with the roughness of the neck block. As they say, it was like that when I got there!

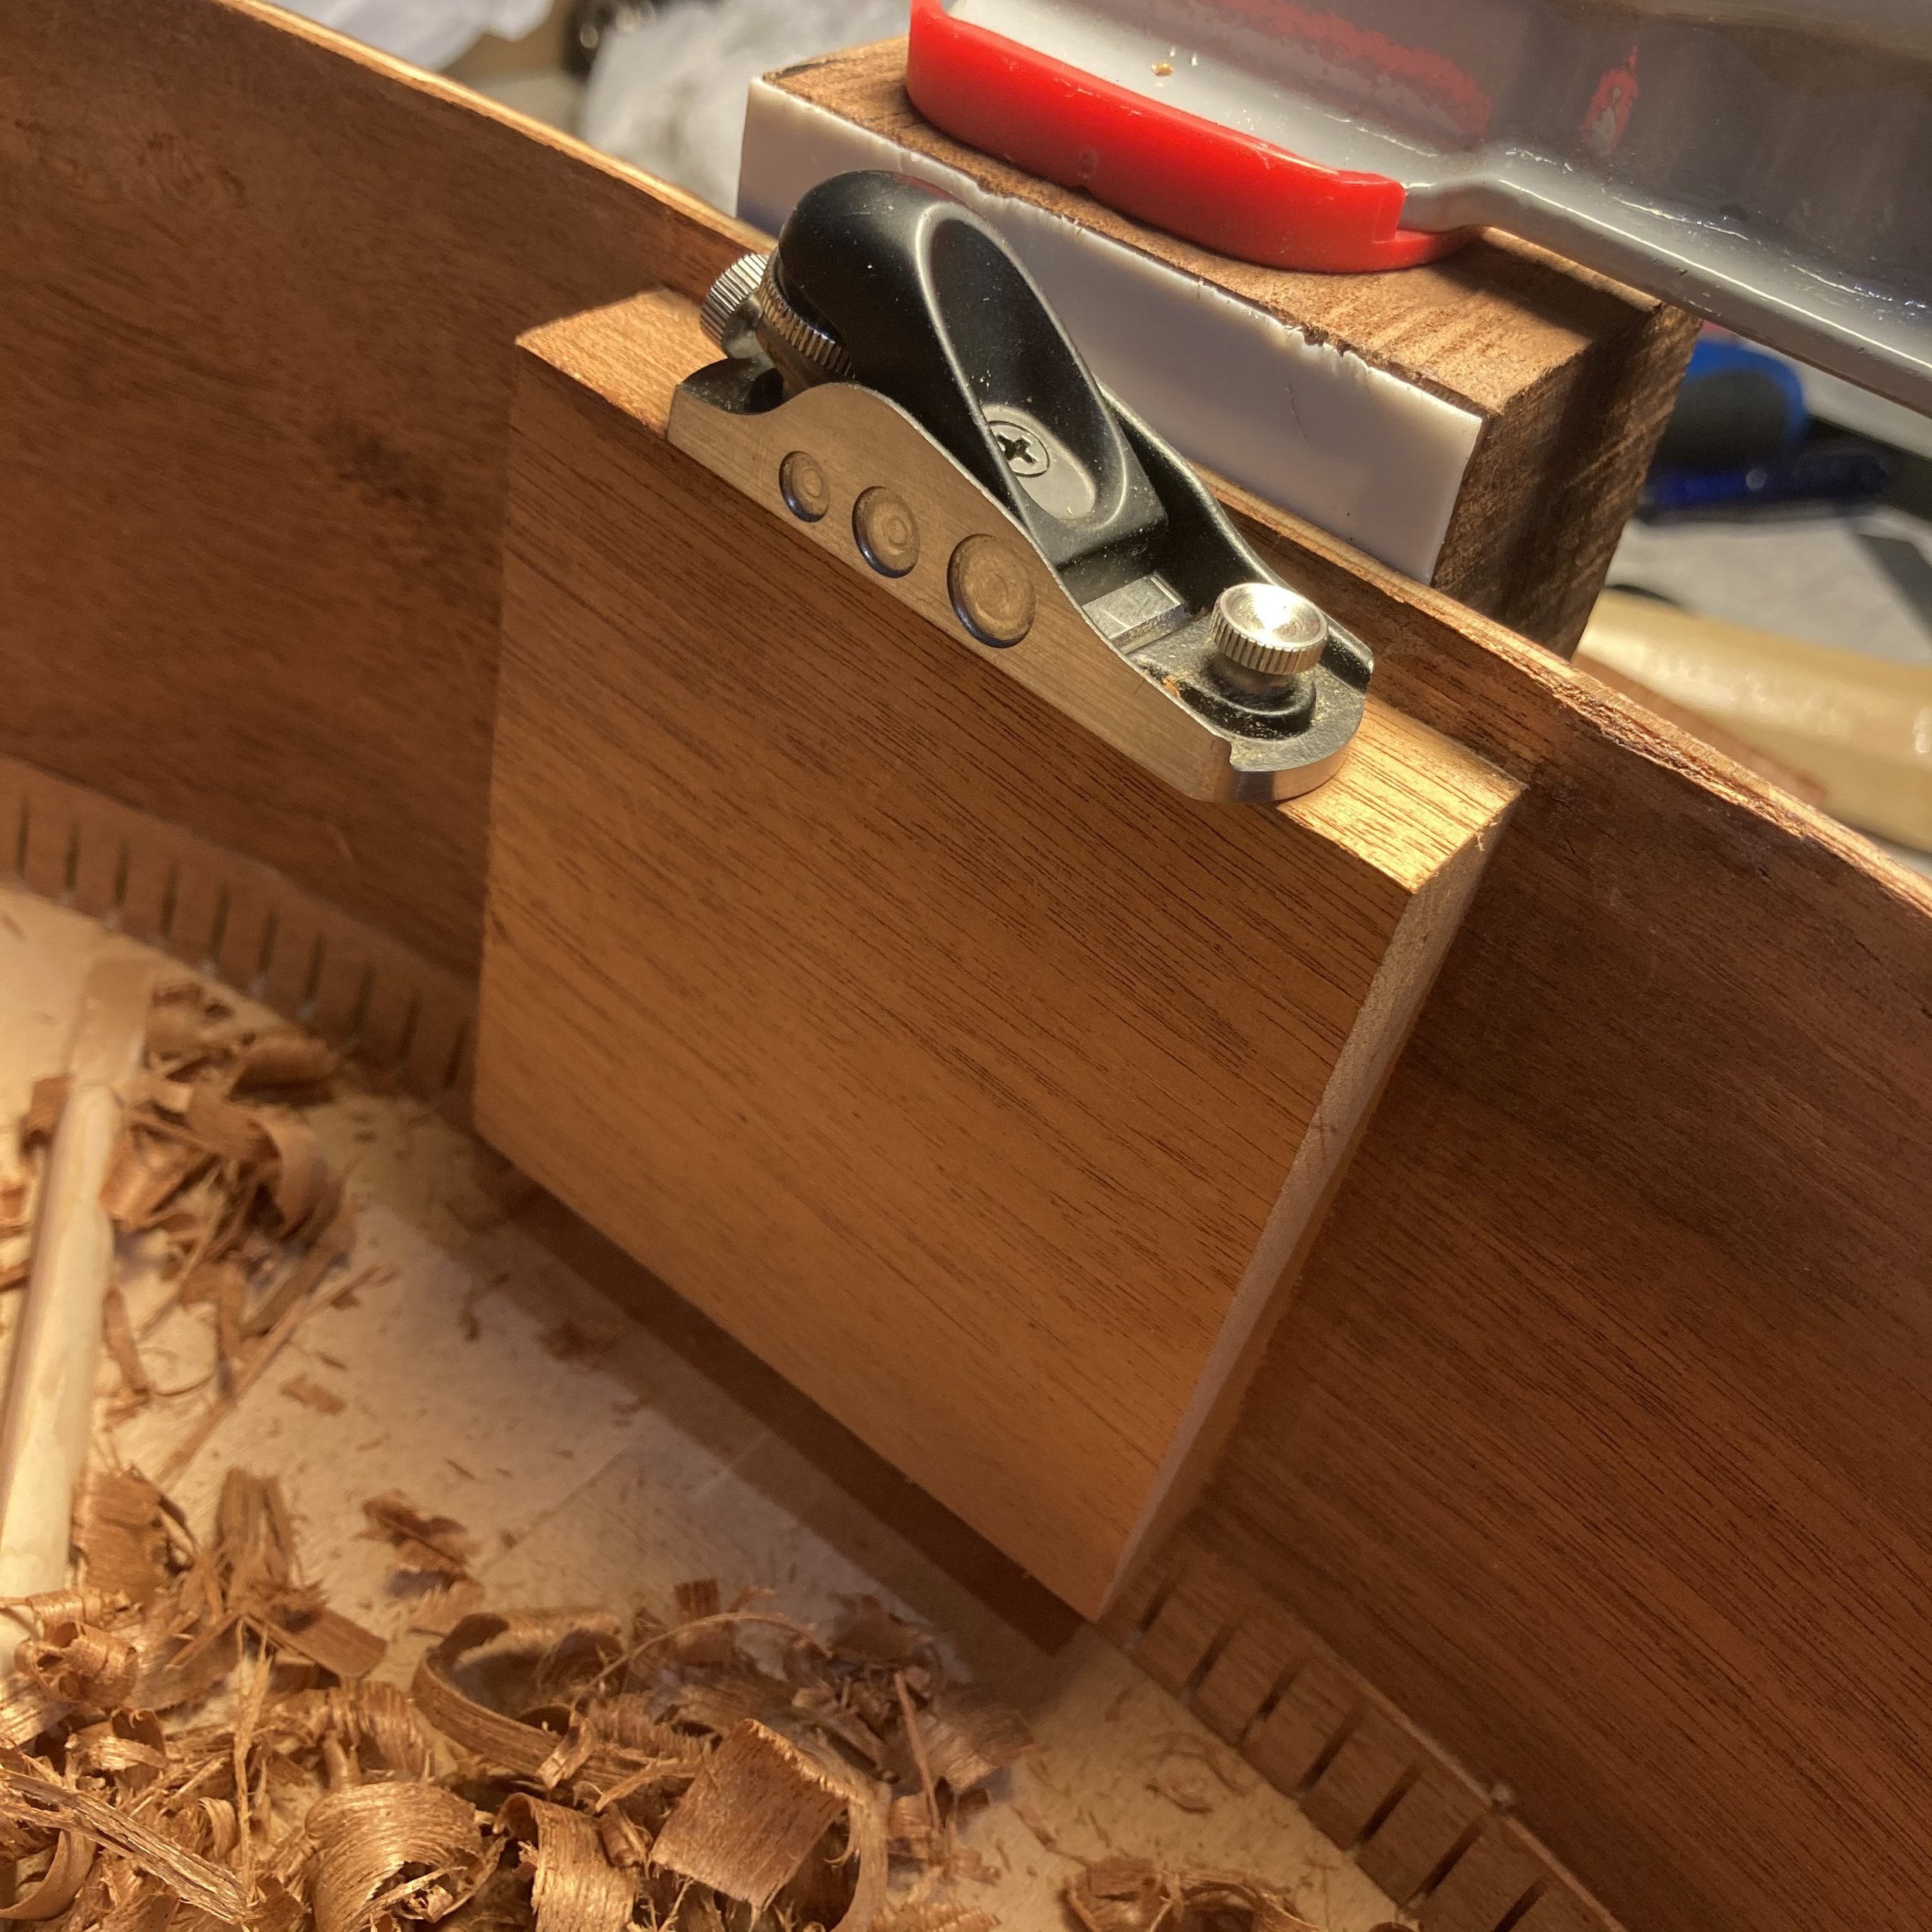


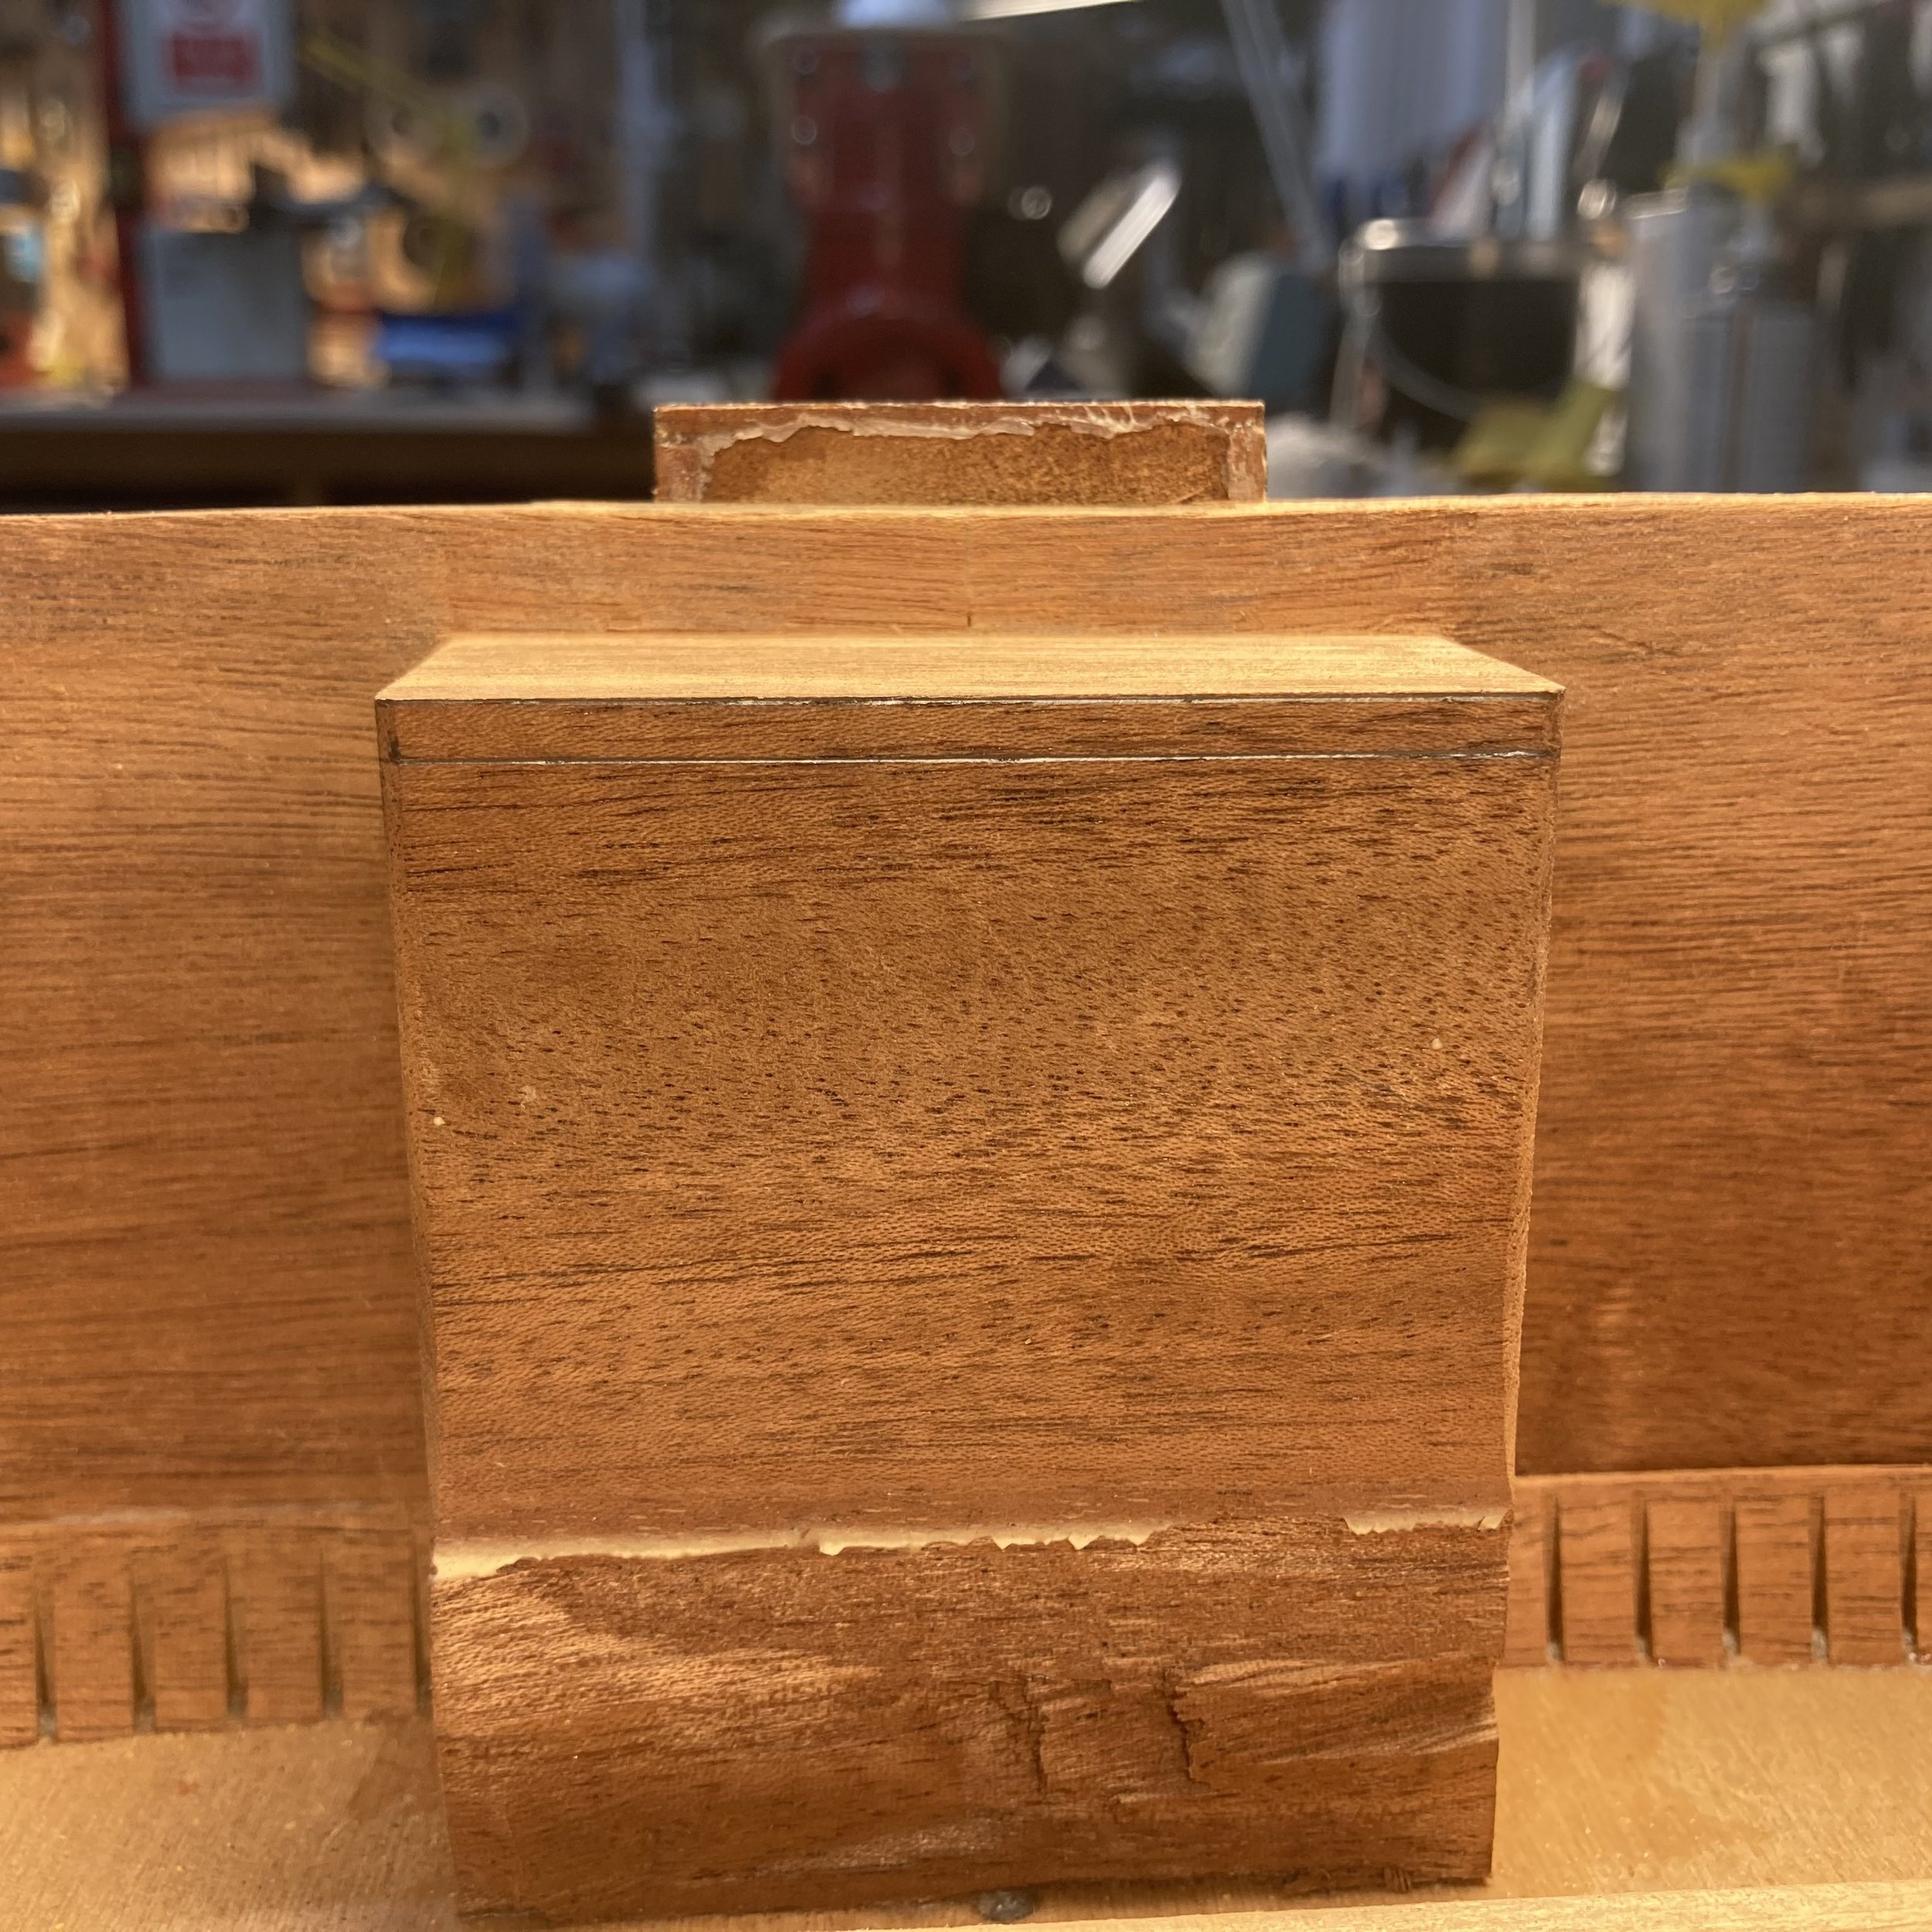
I chose some decent matching wood and began shaping and aligning them with the guitar and blocks. This part takes so long but is absolutely essential for the guitar to work properly again. I want to have nice clean contact with the guitar’s back and the blocks will need to match the back’s angle and radius as well. Once ready, they are glued into place and I then begin gluing the new kerfing along the edge with just enough height to allow me to carve it into shape


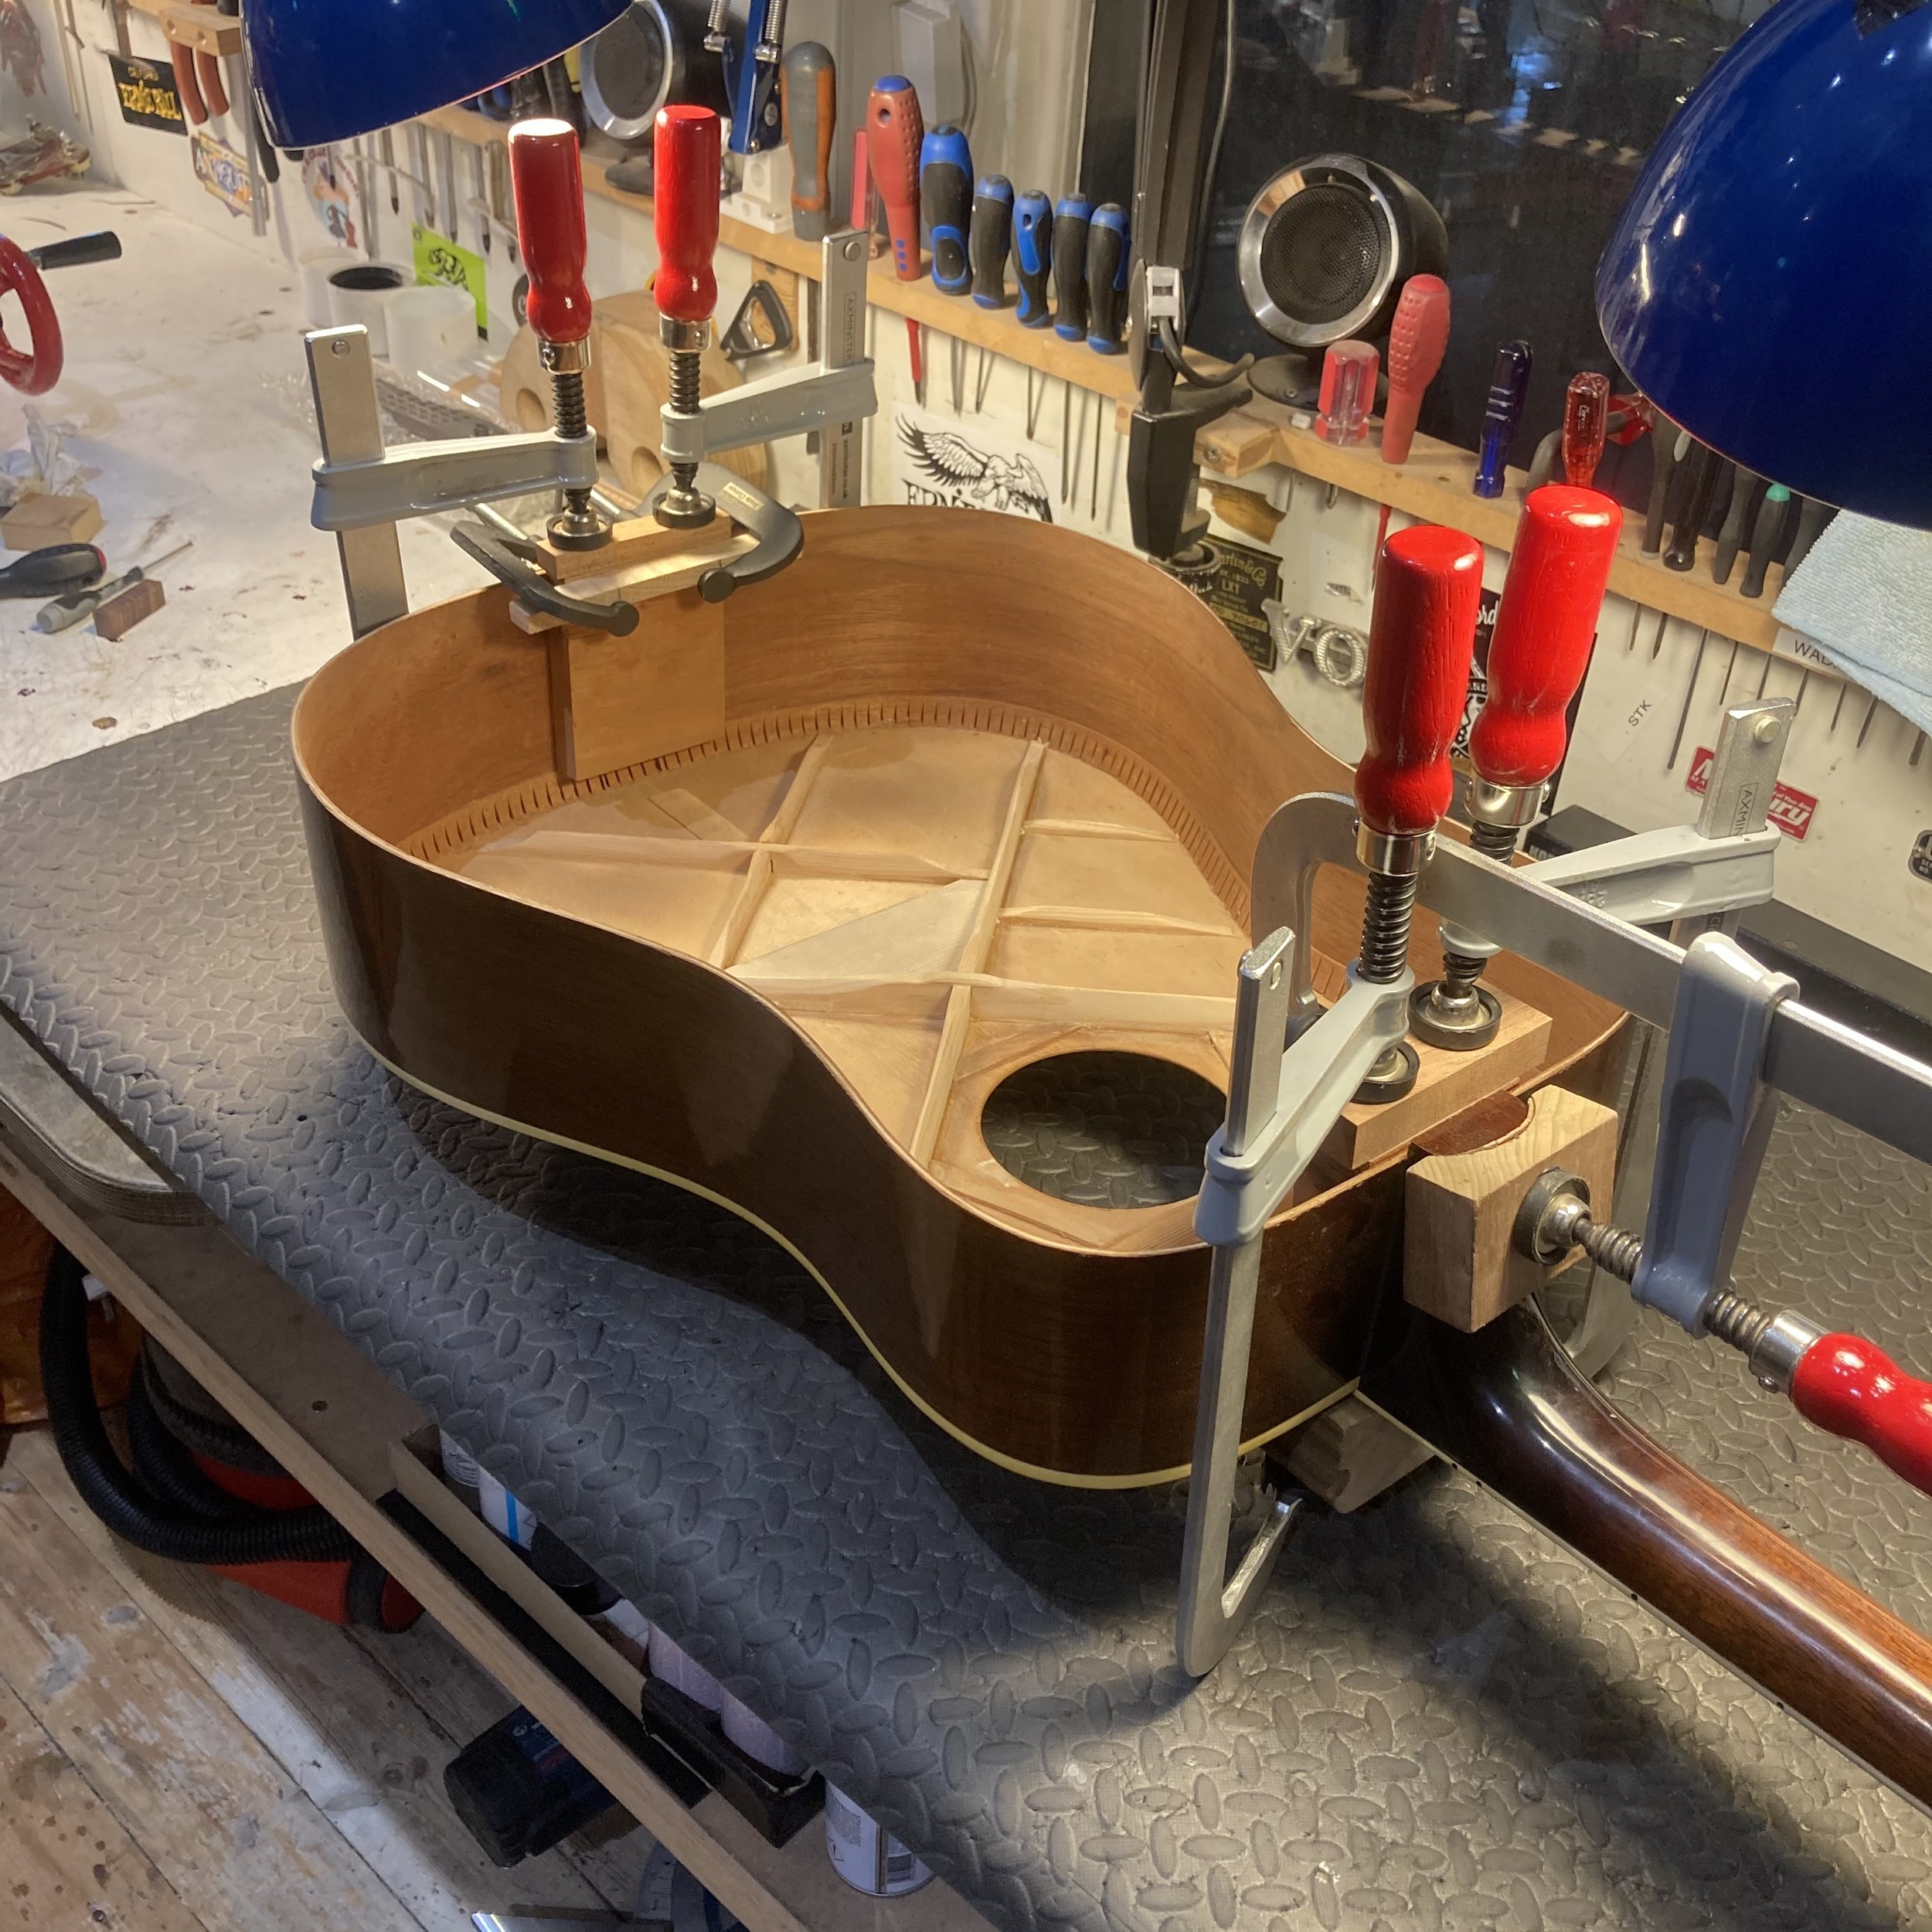

Once everything is clean and set, I prep for placing the back on again. I check for a nice clean alignment and contact along the whole back where it meets the body and then work out a rather complex looking but actually rather a simple method for holding the guitar while gluing the back into place. Everything’s gotta be assembled together all in one here, so there’s no room for error!


With the back attached to the guitar again, we’re ready to move on to the next stage of assembly, which threw yet another curve ball my way! With some rendering of the bottom edge of this guitar underway, I move to the pickguard and bridge, and the final assembly in part 3!!