
Project of the Year goes to - This Crazy 1970 Gibson SJN Southern Jumbo

Well, not everything can always go to plan, or so it is said. Not much in this project went to plan, but the end result was extremely satisfying!
A very good client of mine brought me in a 1970 Gibson SJN ‘Southern Jumbo’ that had been purchased on a recent trip to the United States. The requested raising of the action is typically easy enough to accomplish, but unknown to me this was going to be a little extra. Although the guitar was in excellent shape cosmetically, it was immediately apparent that something was very wrong. The adjustable bridge was at maximum height and the strings were still almost hitting the frets. The bridge height was also putting an incredible amount of pressure on the top, and I was surprised it hadn’t broken off! The acoustic had a lovely basic sound, but was lifeless and lacked drastically in the projection department.

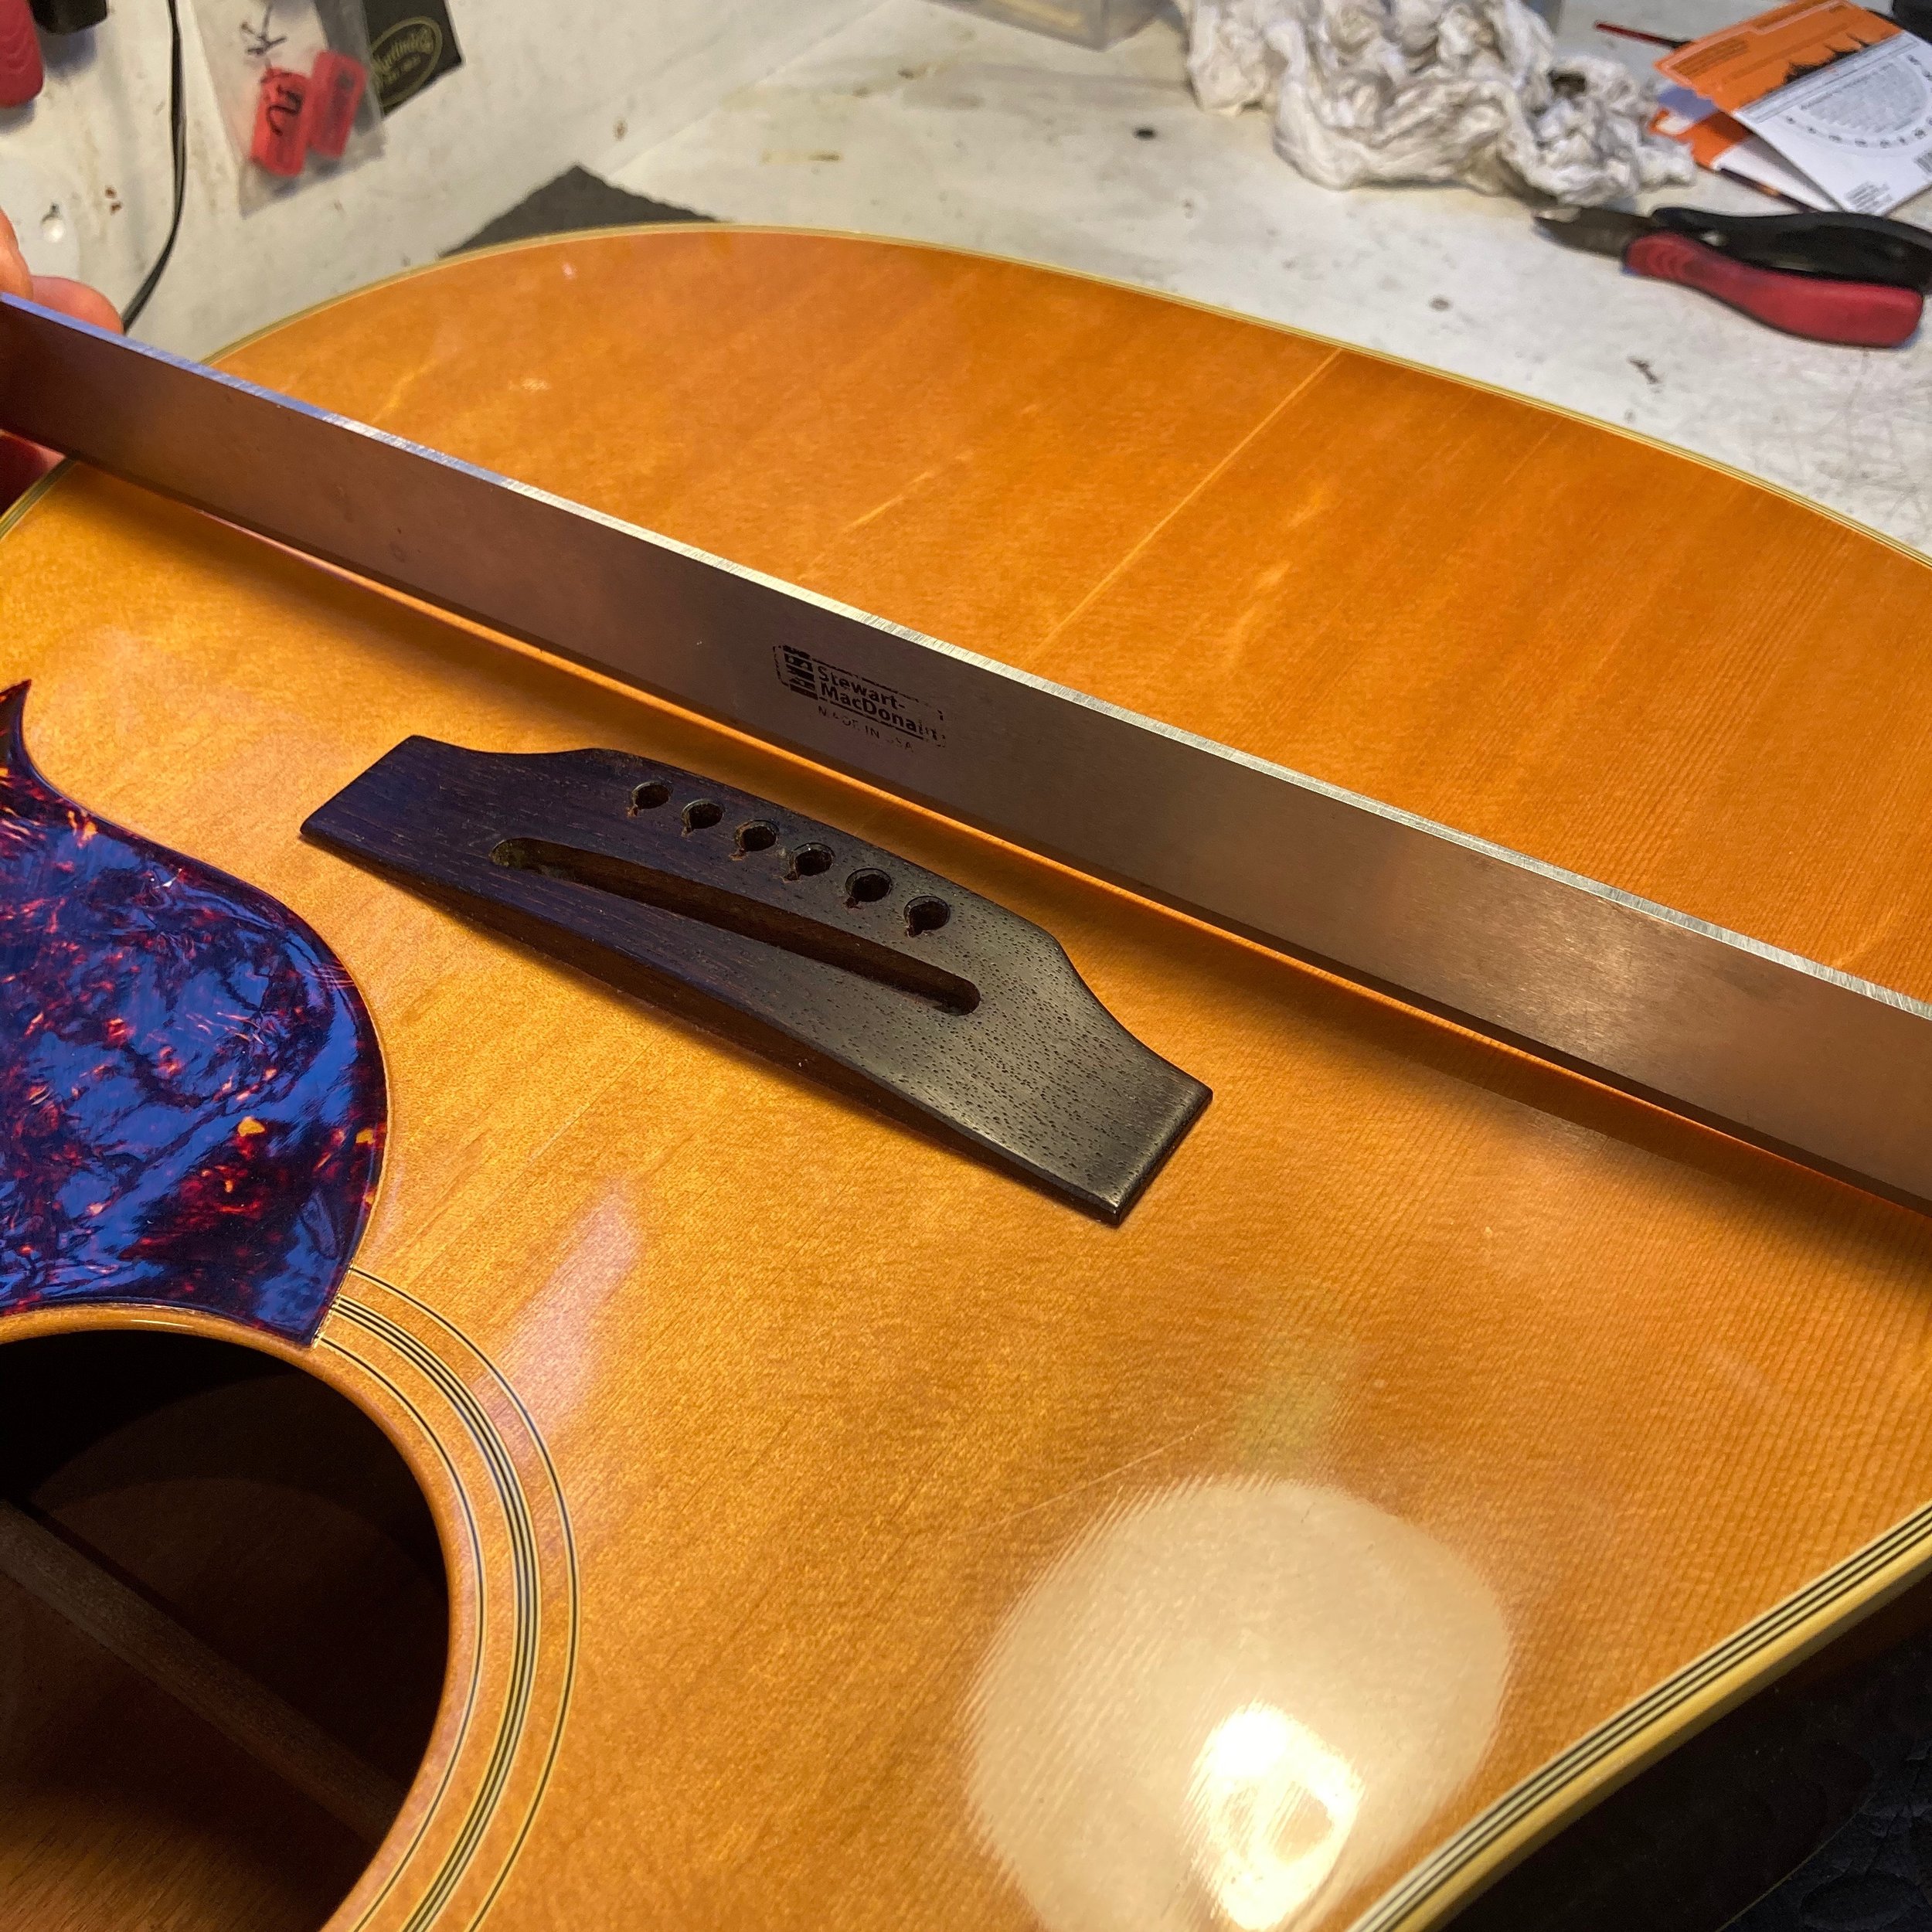
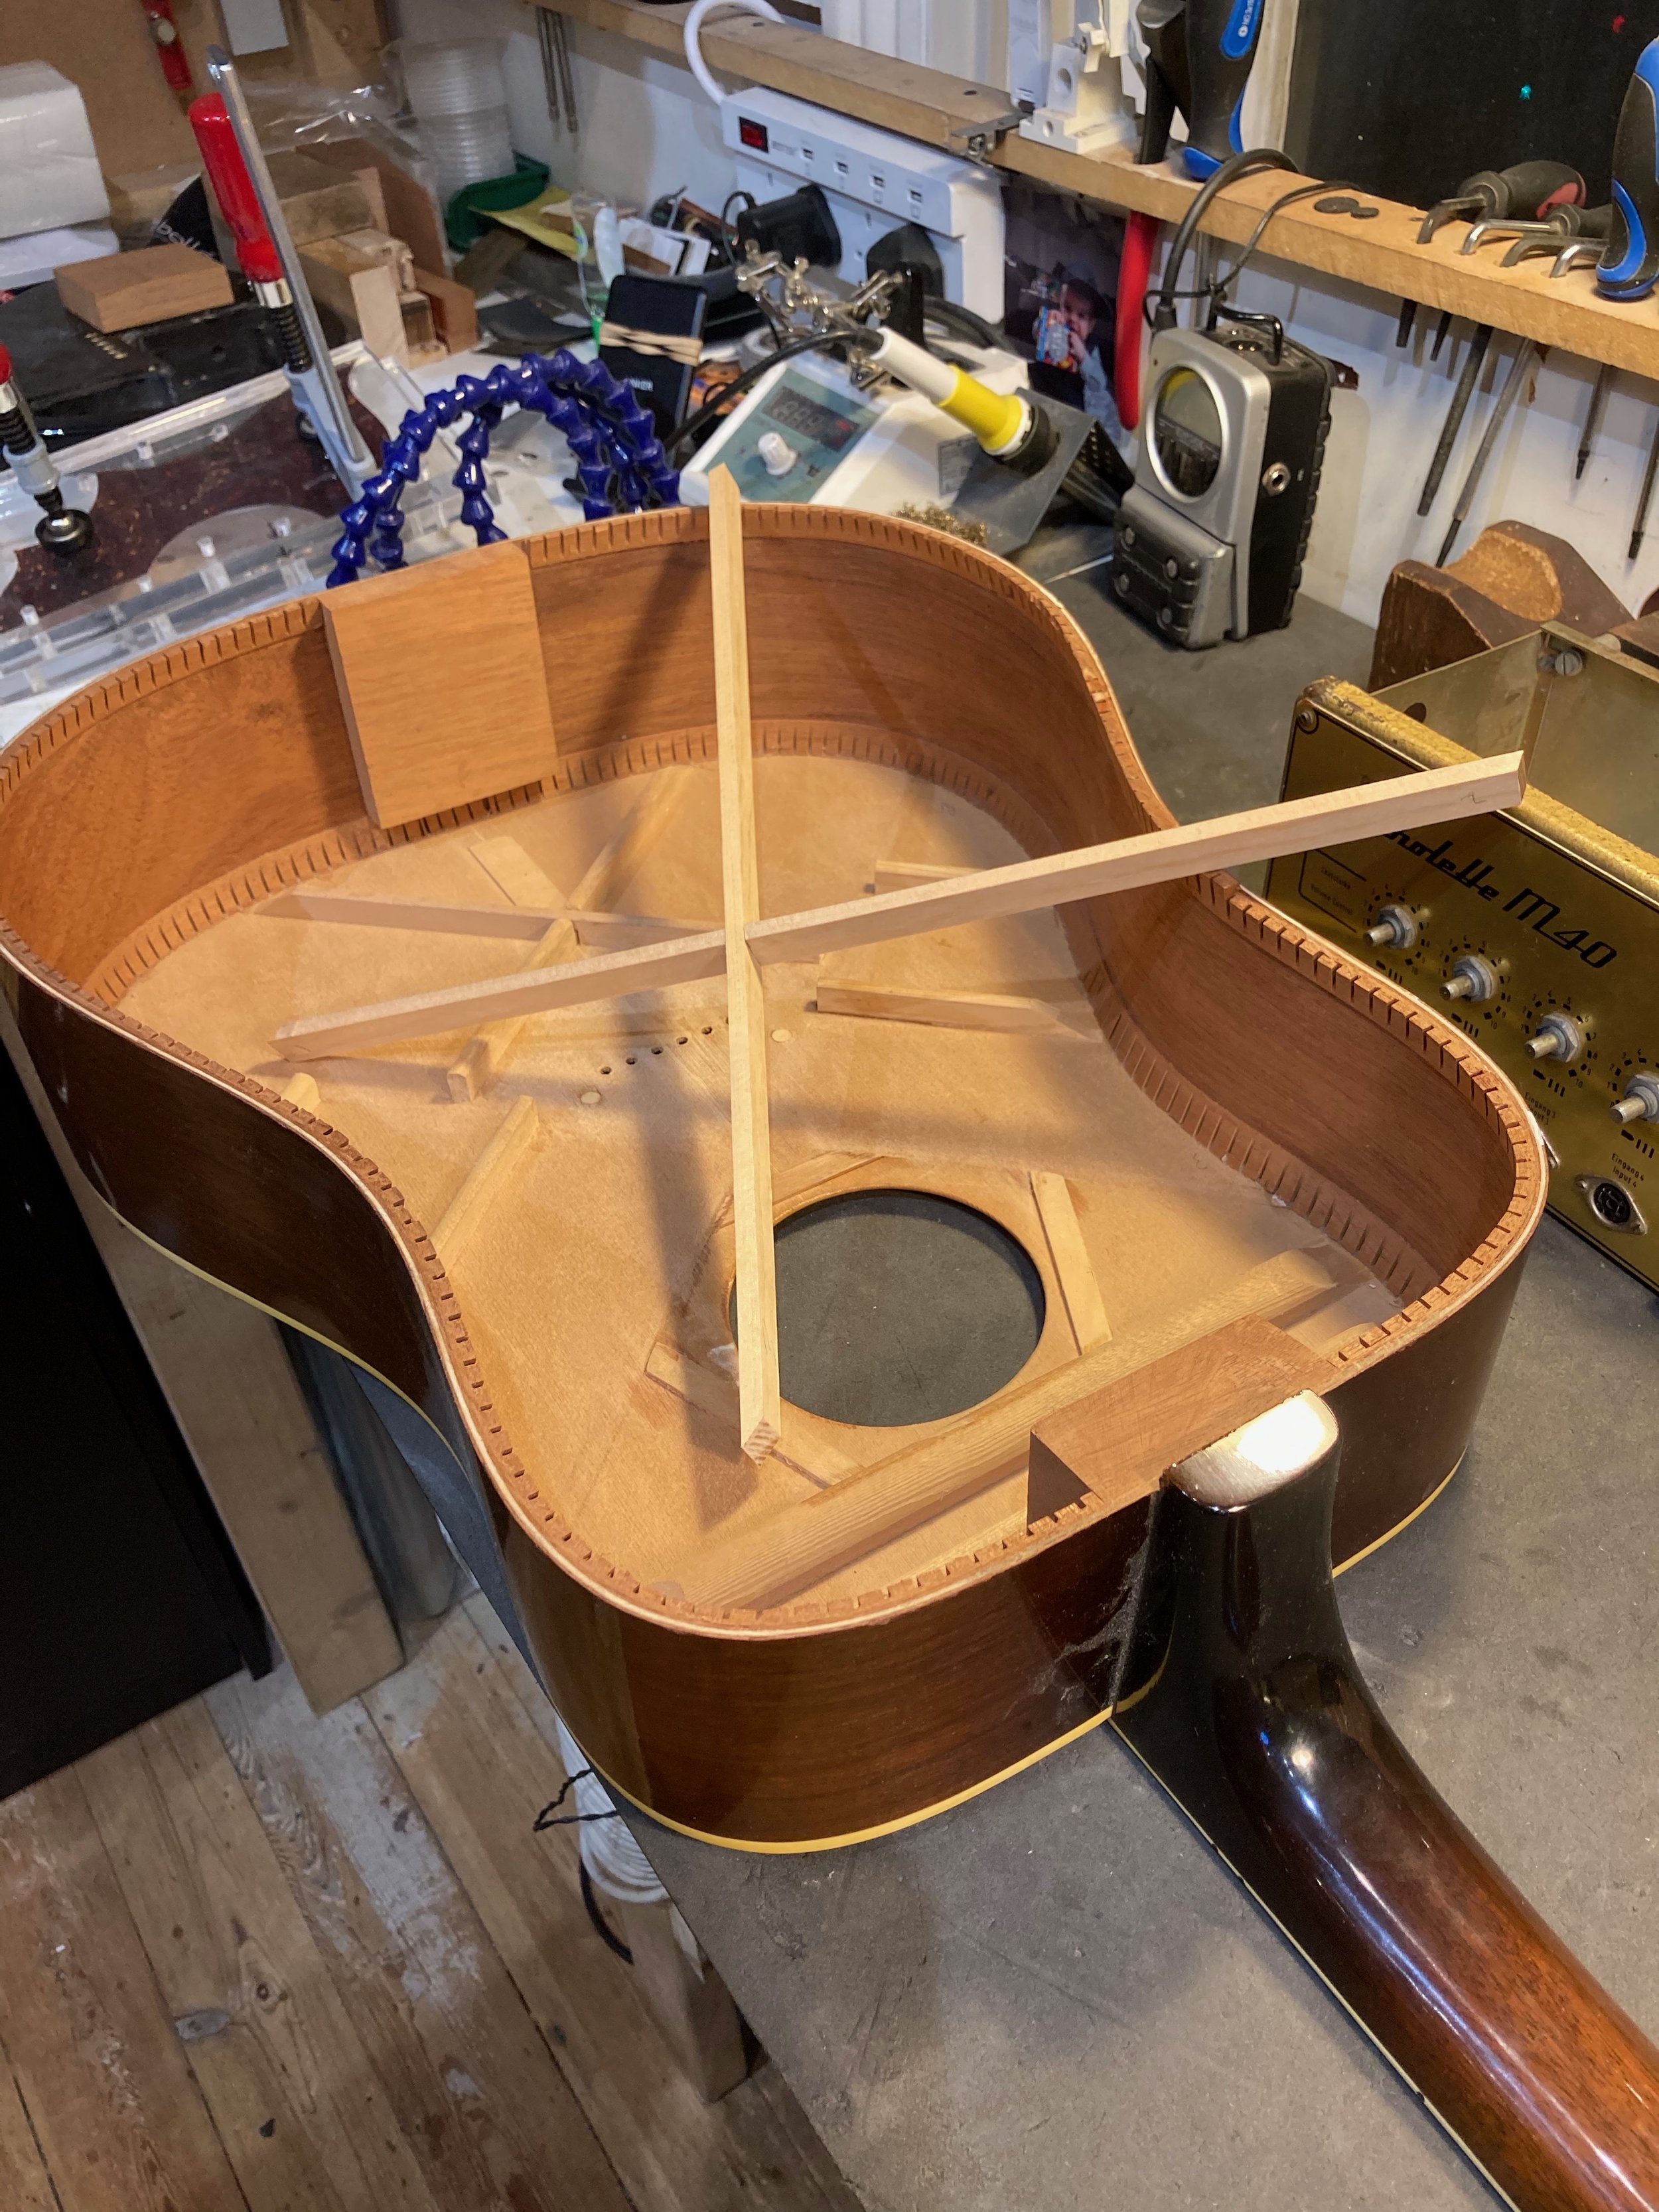
The top had dipped inward massively resulting in the neck angle being waaay overset, and there was not really going to be any easy way to get this sorted.


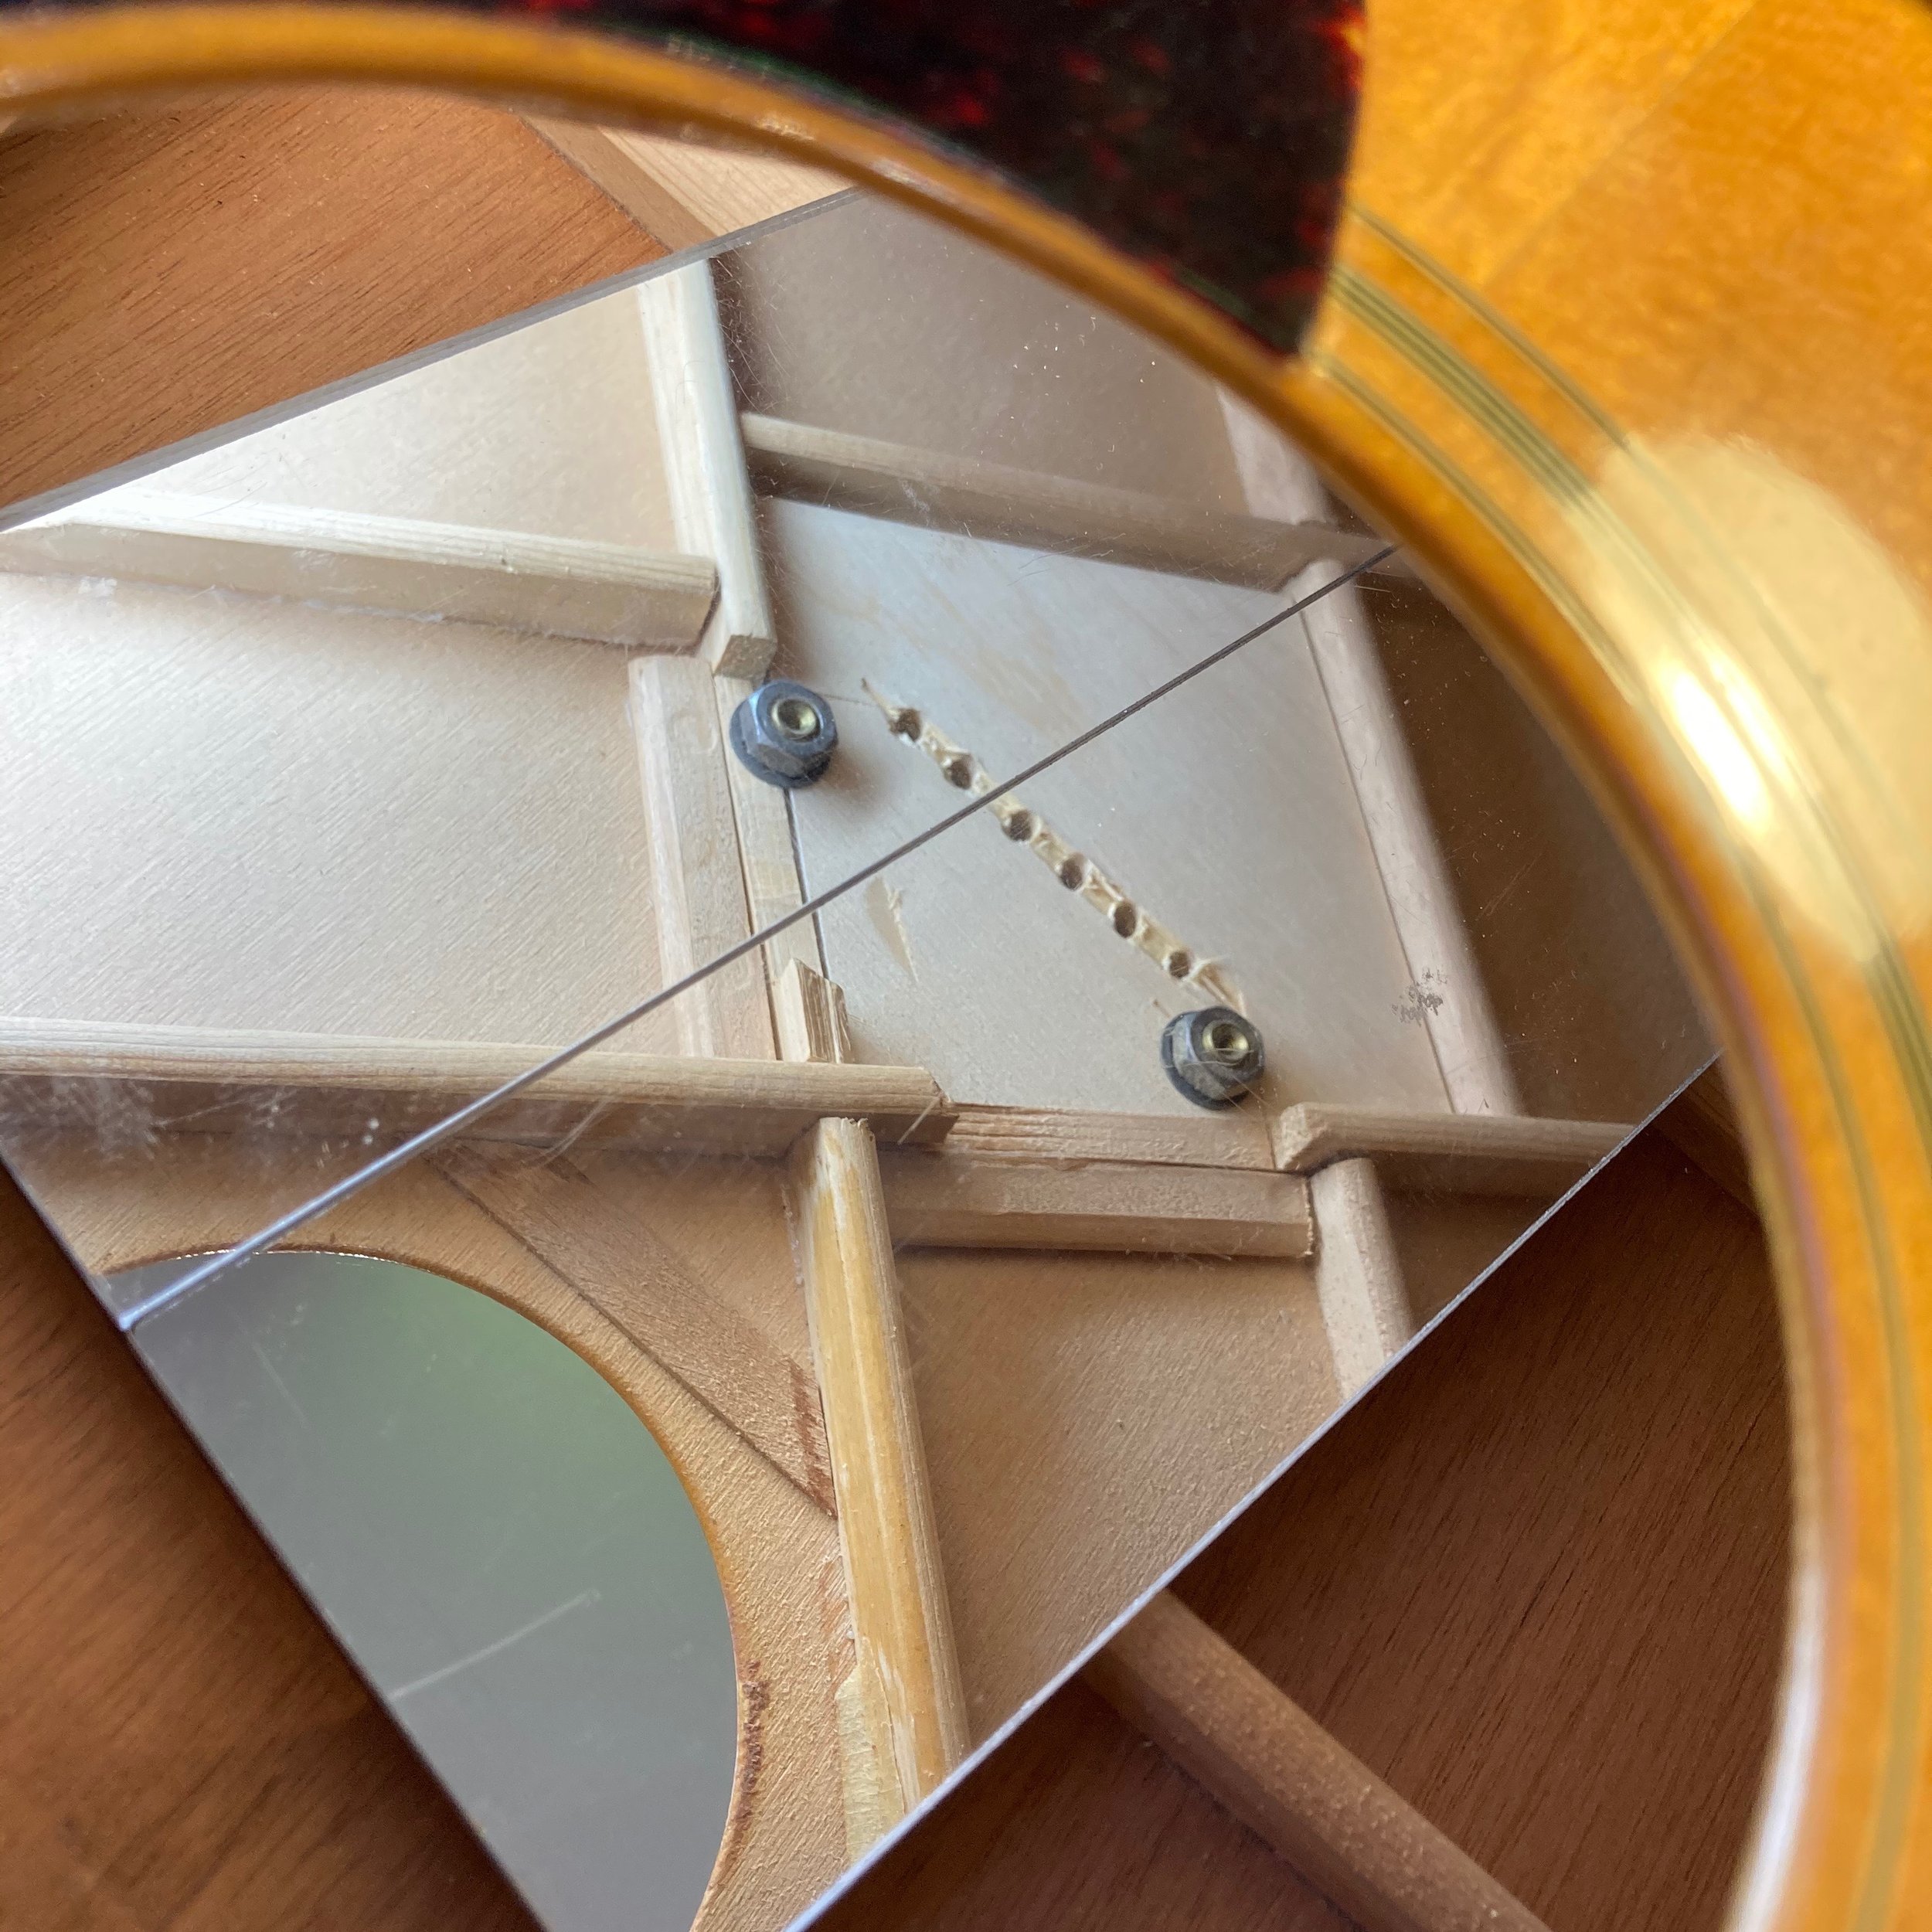
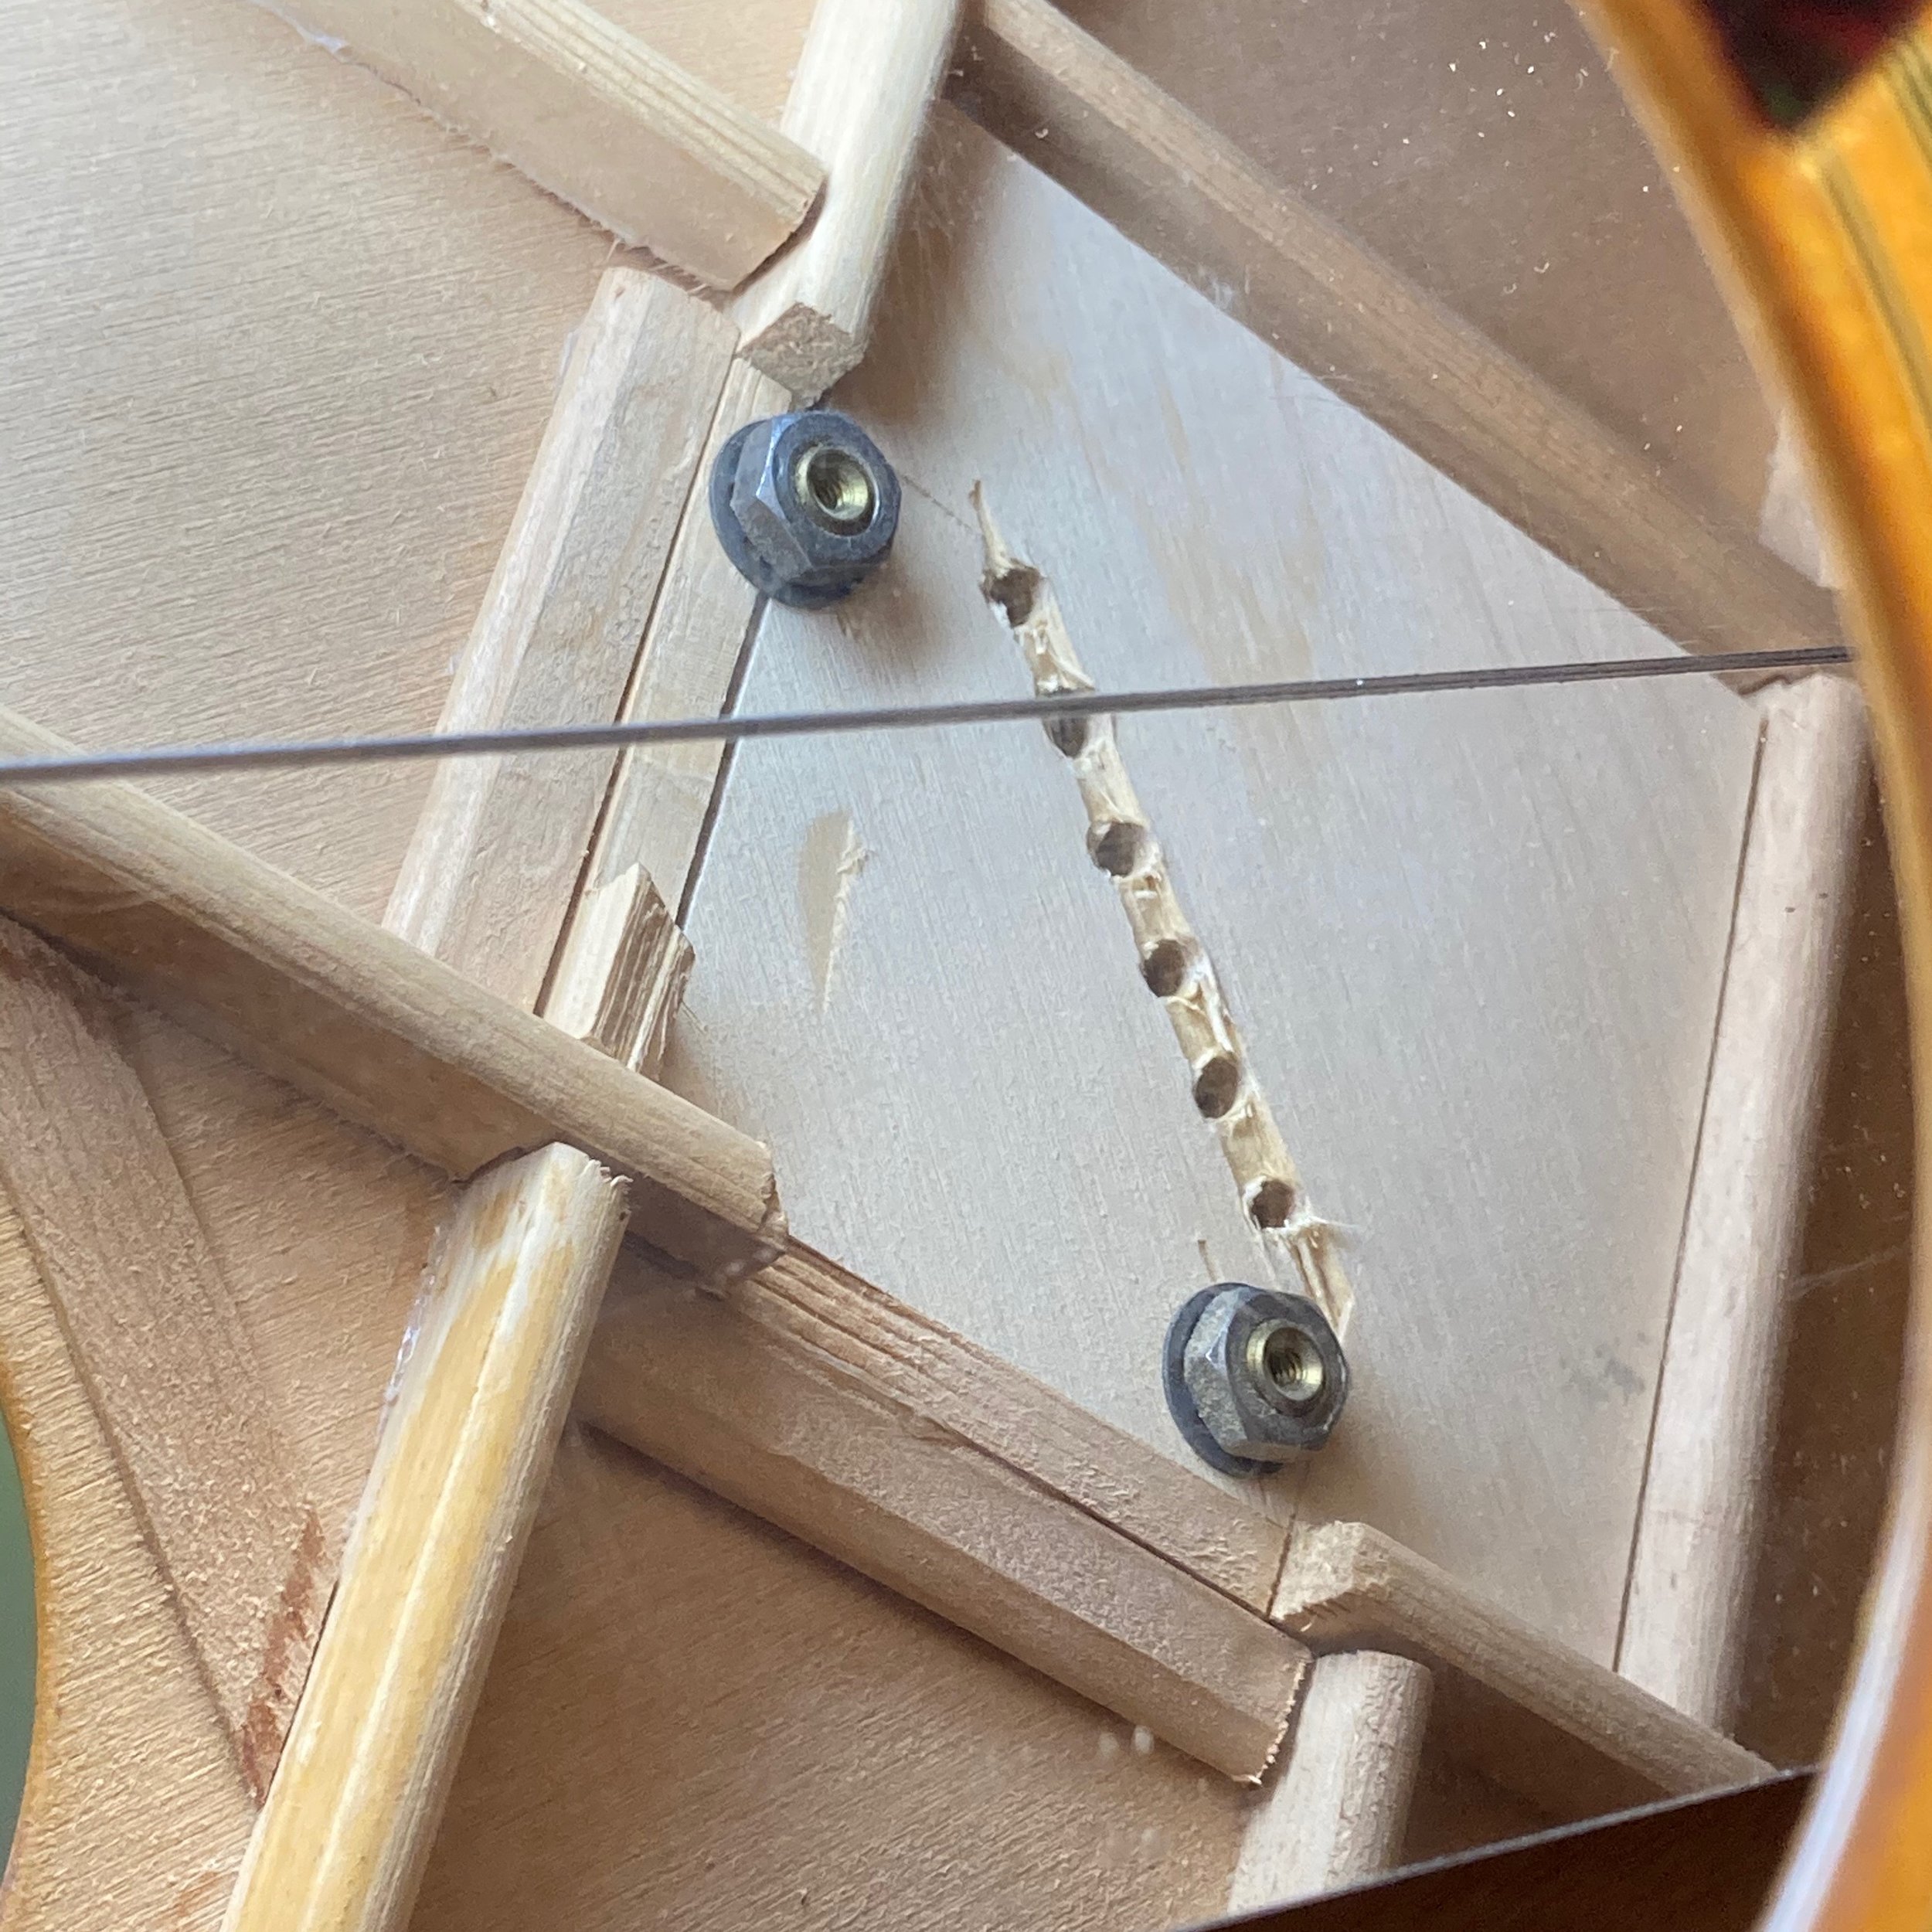
Let’s have a little look inside I think to myself, and my goodness it’s wild in there! Turns out alignment wasn’t on top form that day in the factory and as a result some of the X-bracing had to be ‘removed’ to accommodate the adjustable bridge placement. Too bad this is one of the most key load-bearing areas of both the guitar’s strength and sound. I like the little added pieces of wood next to the cutaway braces, nice touch. This guitar likely collapsed not long out the factory and has been sinking ever since, and now with other loose bracing plus the 1/4 of an inch plywood bridge plate, its time has come. I guess with that bridge plate, we know why the bridge didn’t break! To be clear, not hating on Gibsons here, I love Gibsons and they’re certainly not made anything like this today. Even at the time, I suspect this contruction was quite an anomaly.
Ok well, here we begin! Or should I say rather that it began with me removing the back of the guitar. Never ever have I had a back that was as difficult to remove as this one. I thought this guitar would be some annoying urea-formaldehyde-type glue, but wow, it just wouldn’t budge. Nothing I tried was gonna get this glue going, but the decision was made to still keep the finish of the guitar as original as possible to lessen the impact of the work. So with no other option, we had to use a space laser to remove the back. The back was cut off just under the binding in the thinnest manner to allow things to be put back smoothly later on. No, It was not a space laser.
The long damaged bracing is slowly and carefully removed, and the incredibly thick bridge plate is gently taken off as well. New braces are roughed out and prepped to go in!

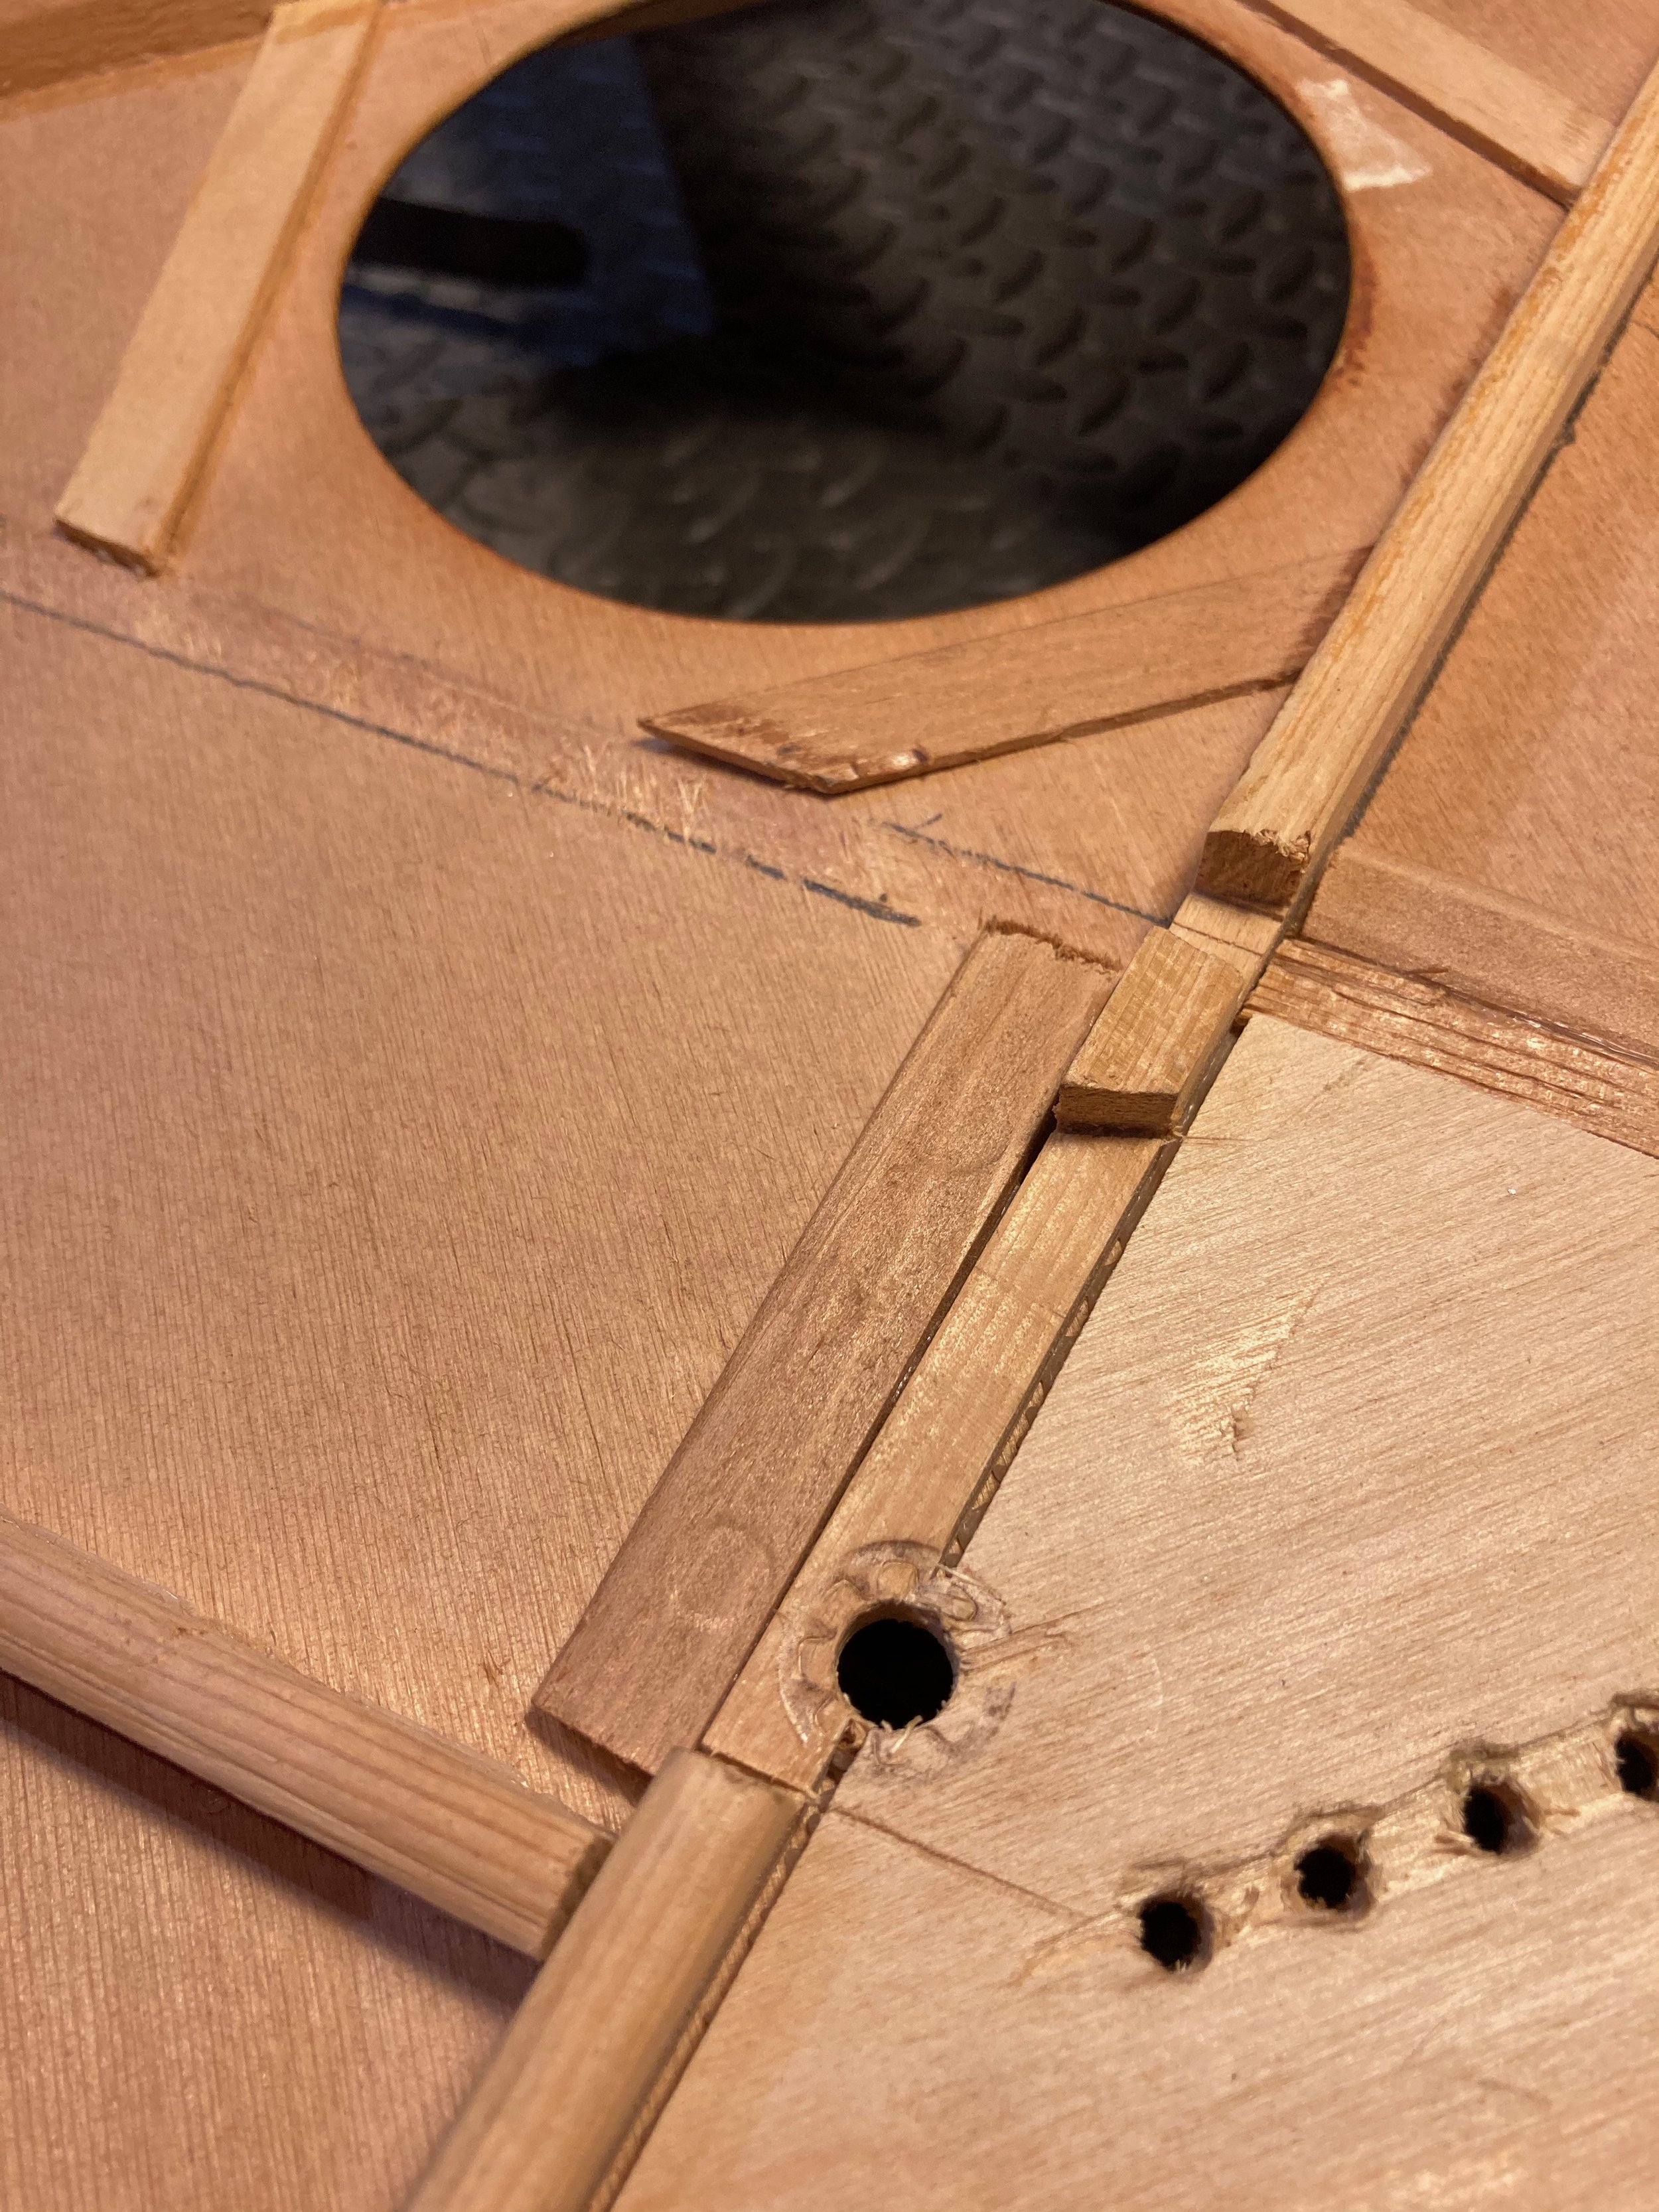


The new X-braces and readied and I’ve chosen to make them just a tiny bit wider, to help with some of the structure and alignment issues the guitar had originally. I’m after improving the way they interact with each other too after all. They are measured, roughly sized and fit, before being notched and sanded into a gentle radius on the top side. Many test placings at this point to get it just right, as this guitar has always been a little unusual (not to mention uneven) So I’ve gotta take that into account. Finally, they’re ready to go…


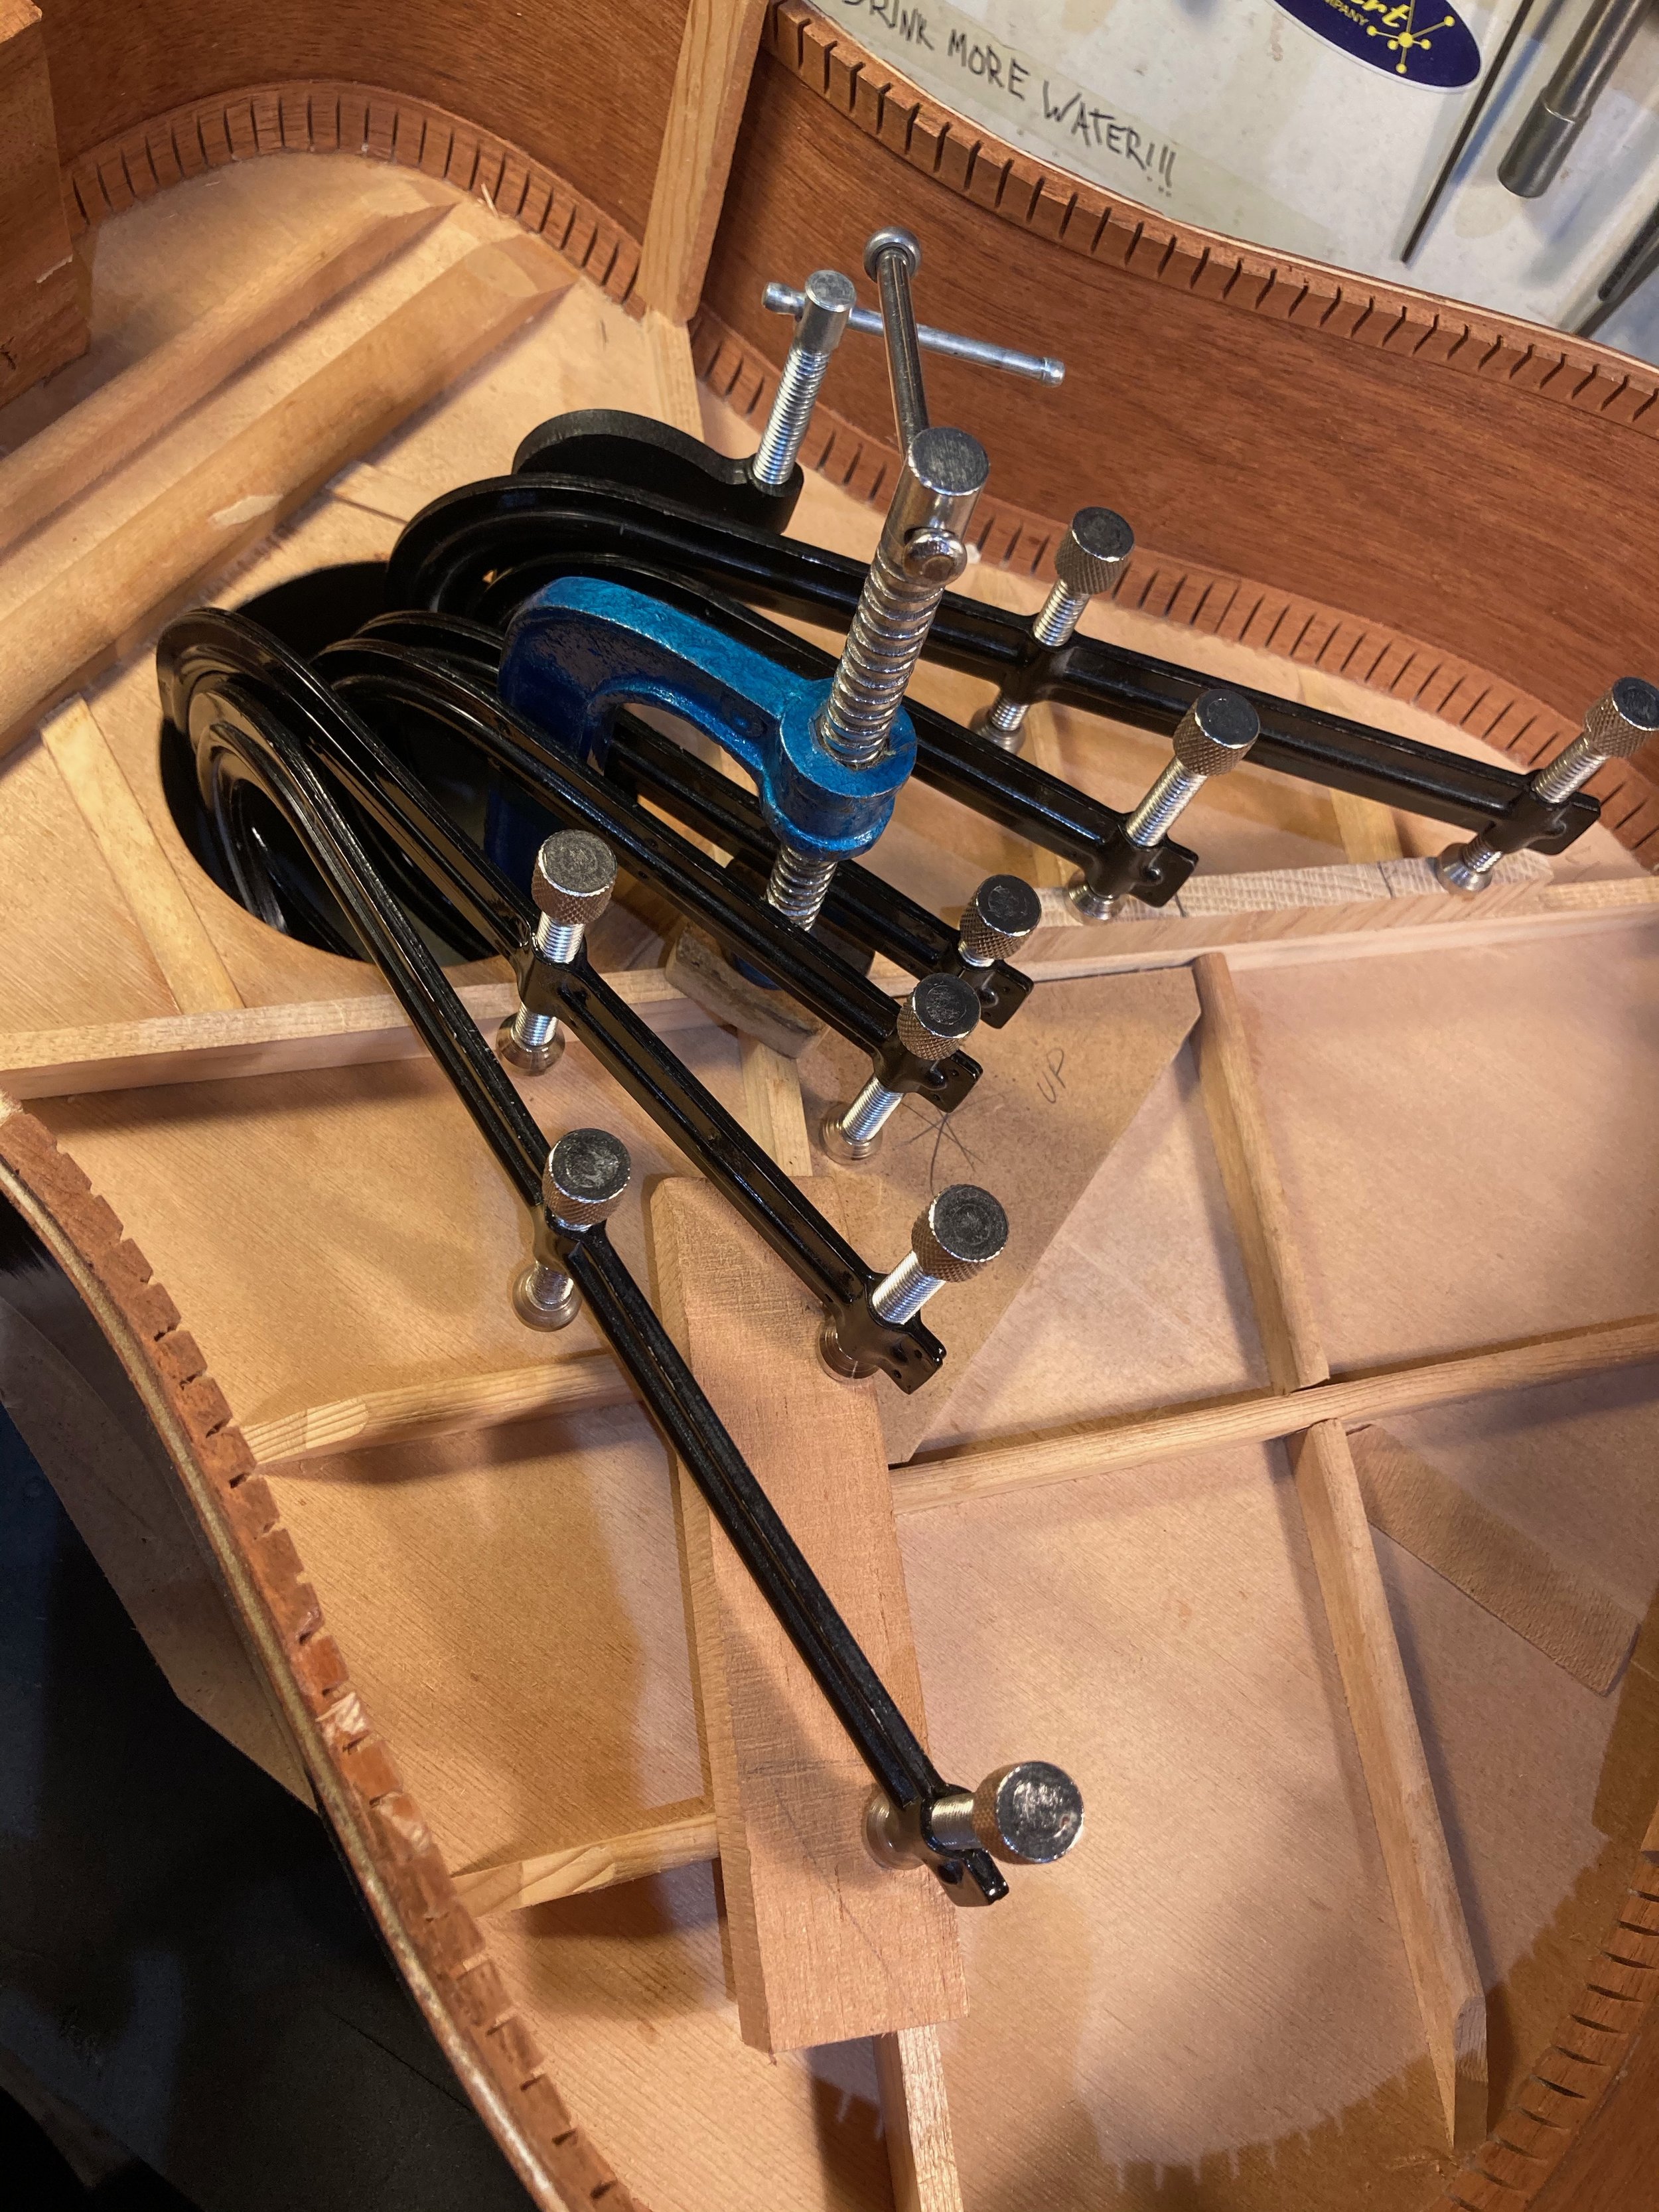
After trying a few different methods, I opted to go with clamping the braces, instead of my classic ‘go-bar’ style. Something about the go bars just wasn’t clicking this time around and actually, my test method for the braces, raised up and combined with a little gentle weight of the clamps, put the radius and weight distribution in just the right spot for gluing. Weird, but it works and I’ve learned over the years it’s sometimes best to just do what the wood wants to do. Once that was dry and clean, I spent a little time carving and finishing the braces off. Anyone who’s had to carve braces already in the guitar will tell you how annoying it is, but also a little satisfying too. Perhaps it’s the additional challenge!
I know I’ll get a little grief for this one, but hey, I had to work on them once in the guitar in this case and they’re thicker than the last ones. I want to keep this guitars’ fundamentally promising sound, but bring it to life with some volume and projection, and sure, perhaps a little more sparkle and boom. I could only get better from where it started!


Braces are now all done, and there’s the Gibson waiting with another couple of projects in progress! Everything inside is now all cleaned up and ready for the next stage, the long process of fitting the back on again…


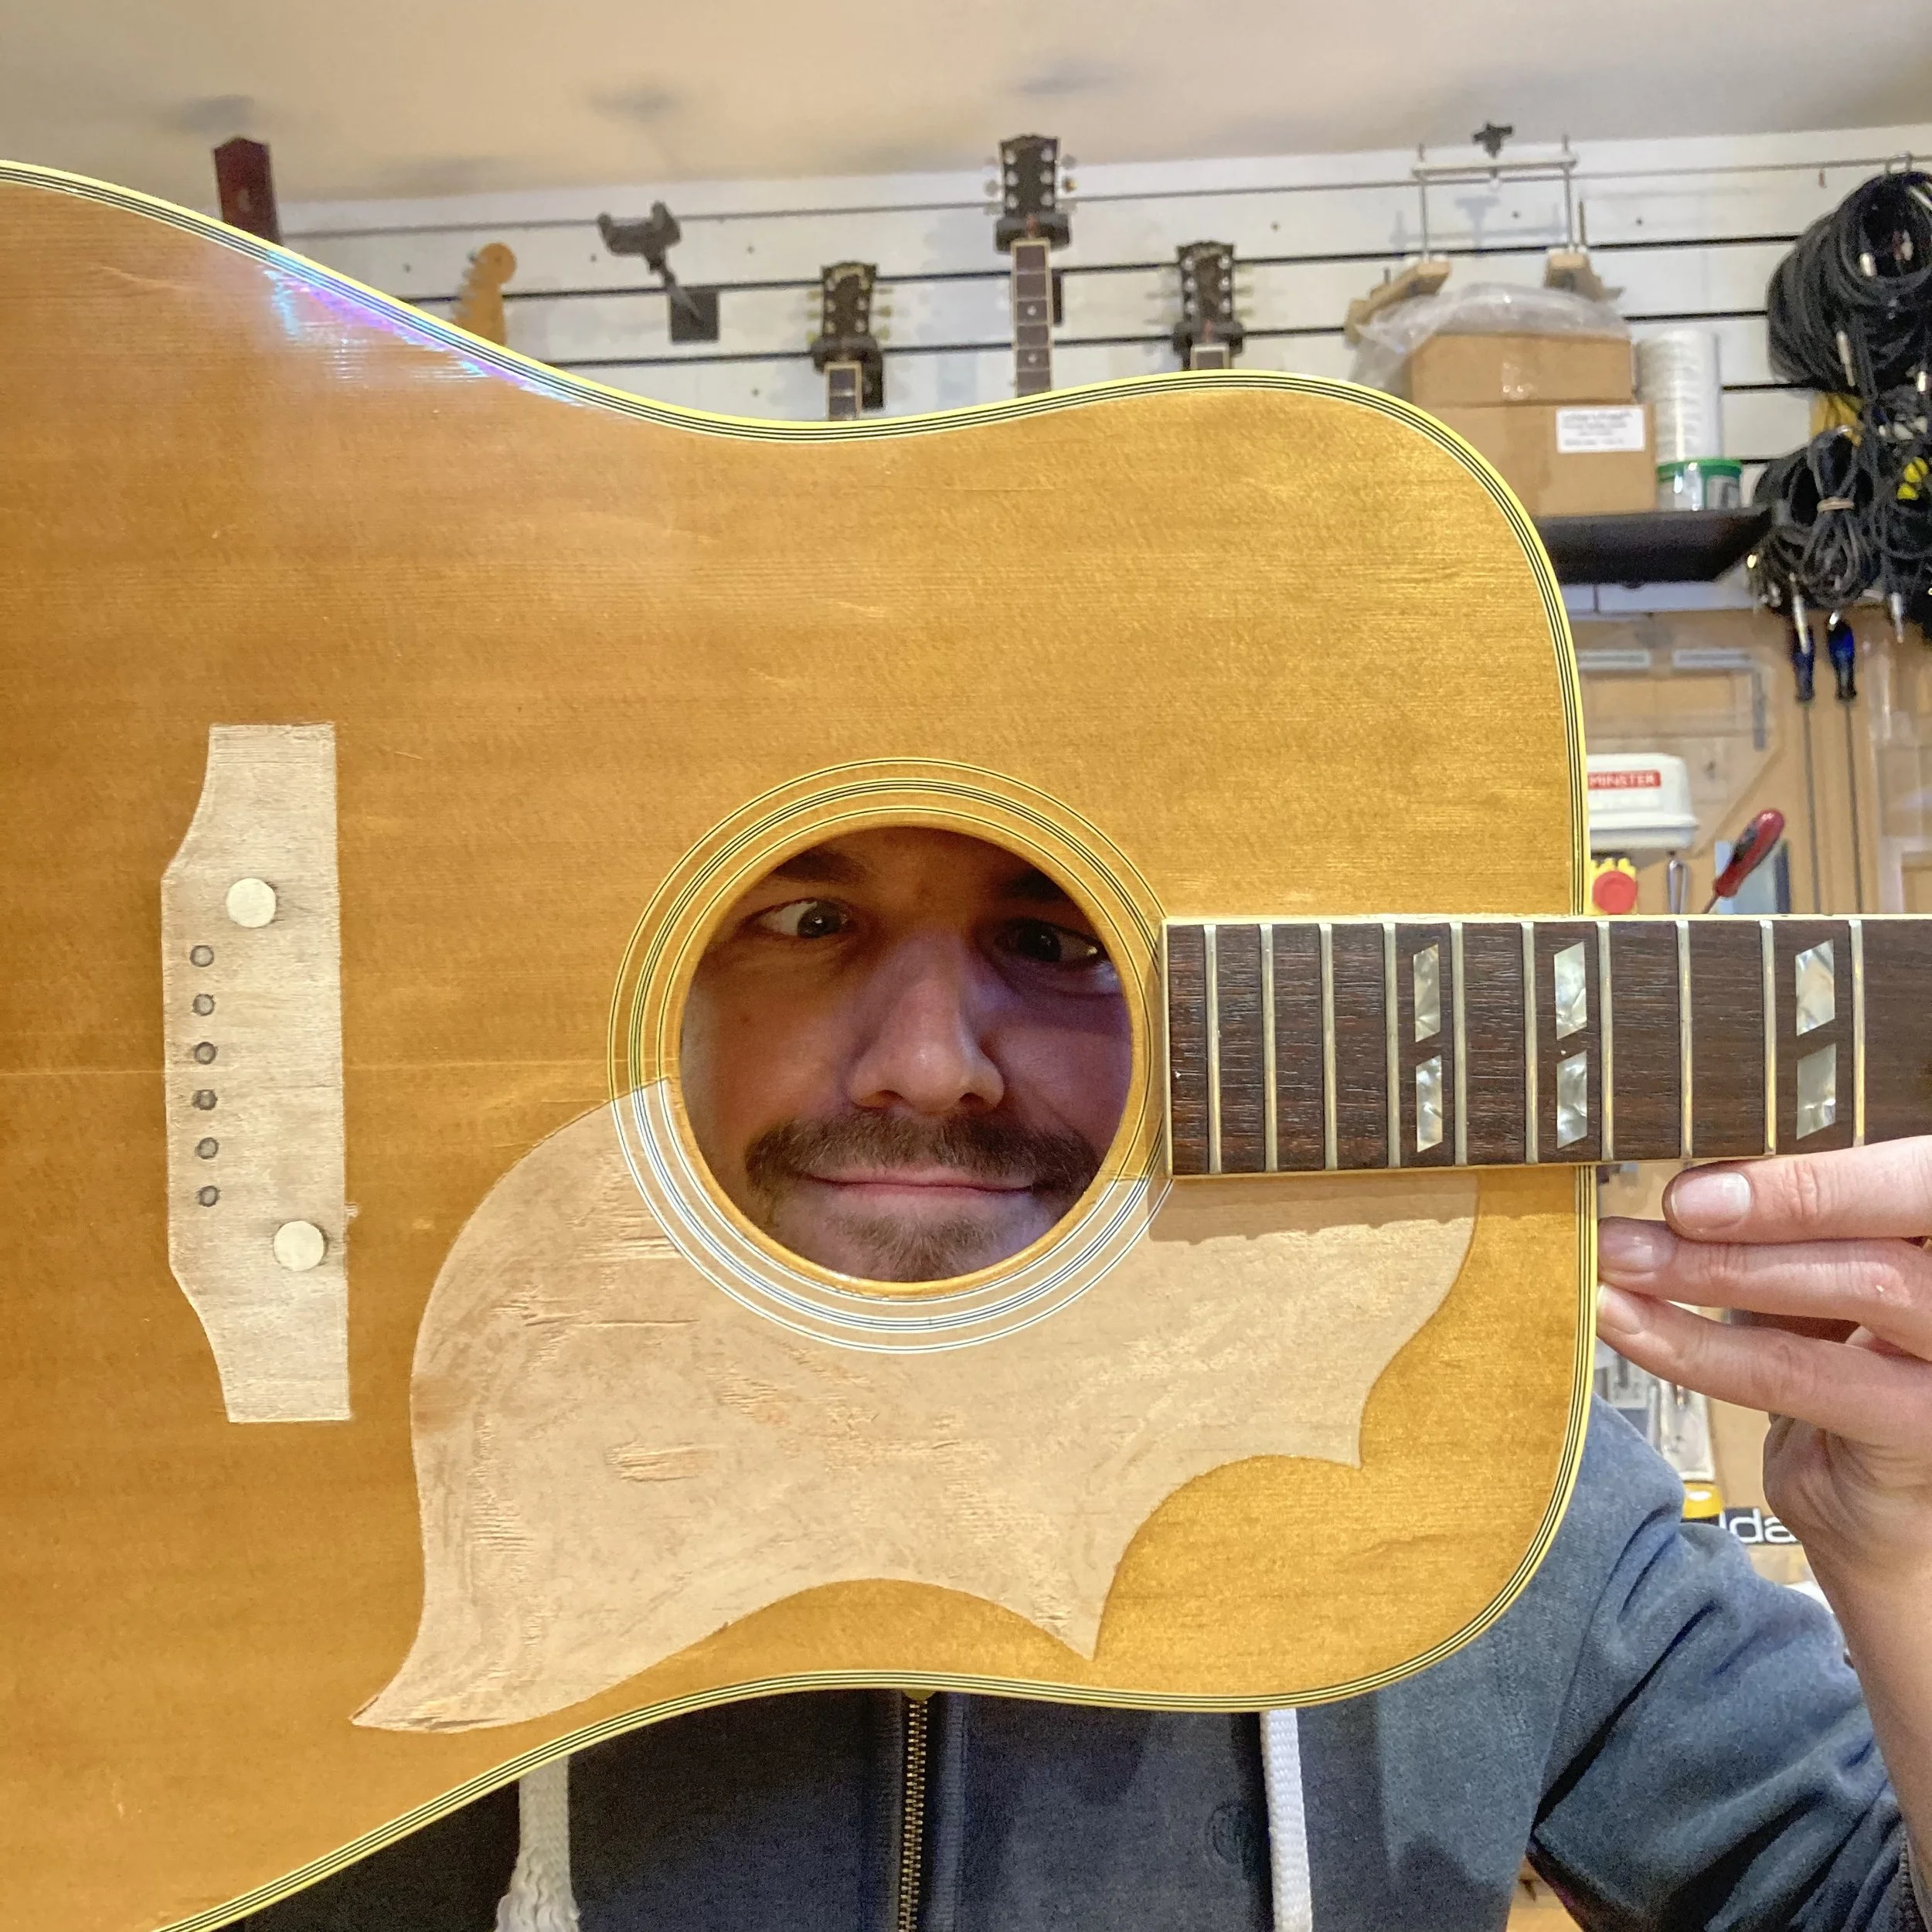
Check out part 2, coming next week, where we get the back on the guitar again piece by piece, and you’ll understand why Gary is making that face